We described the characteristics of buttermilk in our previous article. Most important is that it is more acidic than ordinary milk and that helps things like pancakes and biscuits rise nicely when they interact with baking powder and baking soda.
You can make your own buttermilk substitute by simply adding a tablespoon of white vinegar to milk to acidify it. It really works very well as you can see in the video below.
I first tasted buttermilk at my grandmother’s house in Lincoln, Nebraska. My mother and I had taken the train from Columbus out to Lincoln to visit her family there. I was probably 10 or 12 years old. I came in from playing with my cousin Steve, climbing trees and the like, to find that they were going to make pancakes with buttermilk. I tasted the buttermilk and didn’t like it much. “But,” they said, “wait till you taste the pancakes. They will be like you poured a lot of butter into them!”
And, yes, the pancakes were very good indeed.
Some years later, when I started collecting recipes, I got that buttermilk pancake recipe from my mother’s sister, Elsie, and have saved it ever since. Since it was originally my grandmother’s it is probably over a hundred years old, and was probably made from real buttermilk. Here it is:
2 cups flour
2 eggs
2 tsp baking powder
1 Tb sugar
1 tsp baking soda
½ tsp salt
As a memory guide, Elsie pointed out that you can summarize the recipe as 2-2-2-1-1-1/2.
Mix dry ingredients and add buttermilk until you get a “thickish batter.” Cook in a large cast-iron pan or a griddle. Turn the pancakes when they start to show bubbles.
Buttermilk was originally formed by allowing the milk to stand to separate the cream allowing it to ferment a bit. Then, after churning, they let the buttermilk ferment and thicken. But once centrifugal cream separators were developed, you didn’t have to let the cream set and begin to ferment before churning the butter. So, another way to make buttermilk was developed, where they took part skim milk and added the same bacteria that were found in fermenting the original buttermilk. These were usually Lactococcus lactis and Leuconostoc citrovorum. This was called “cultured buttermilk” and is commonly found in the US, where there is little original buttermilk available.
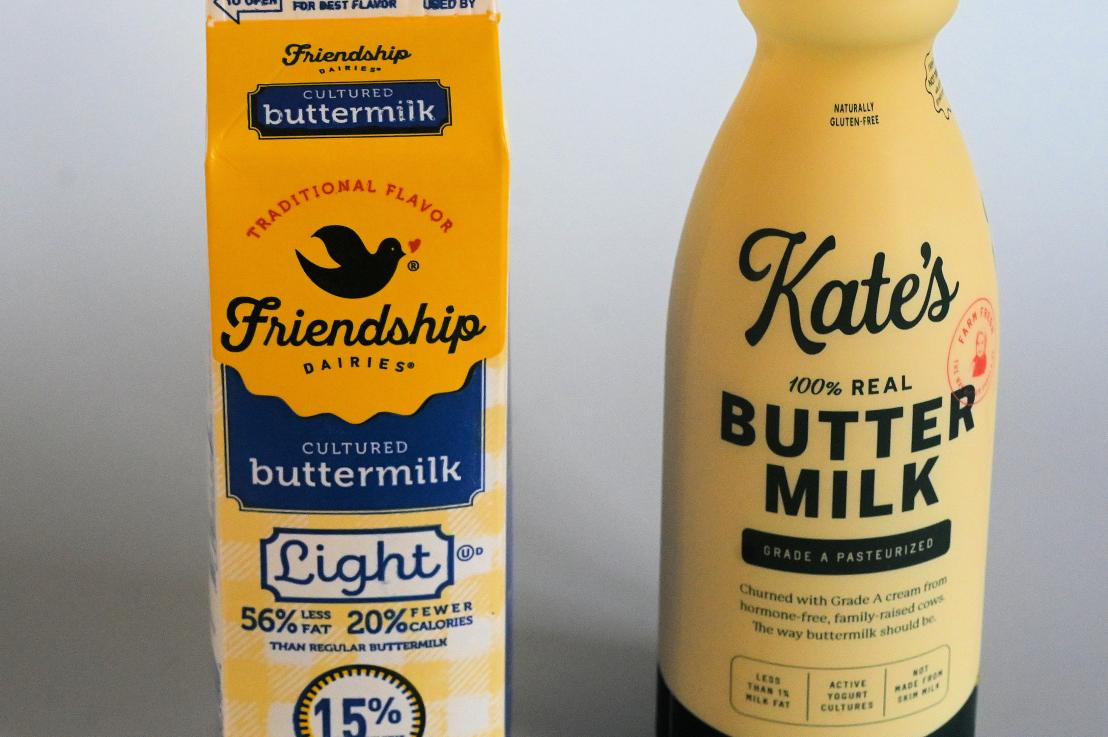
I have been making excellent pancakes using Friendship Buttermilk for over 20 years. But recently, our local market dropping the Friendship buttermilk, offering only Kate’s Buttermilk. You can still buy it at ShopRite and at some Stop and Shops.
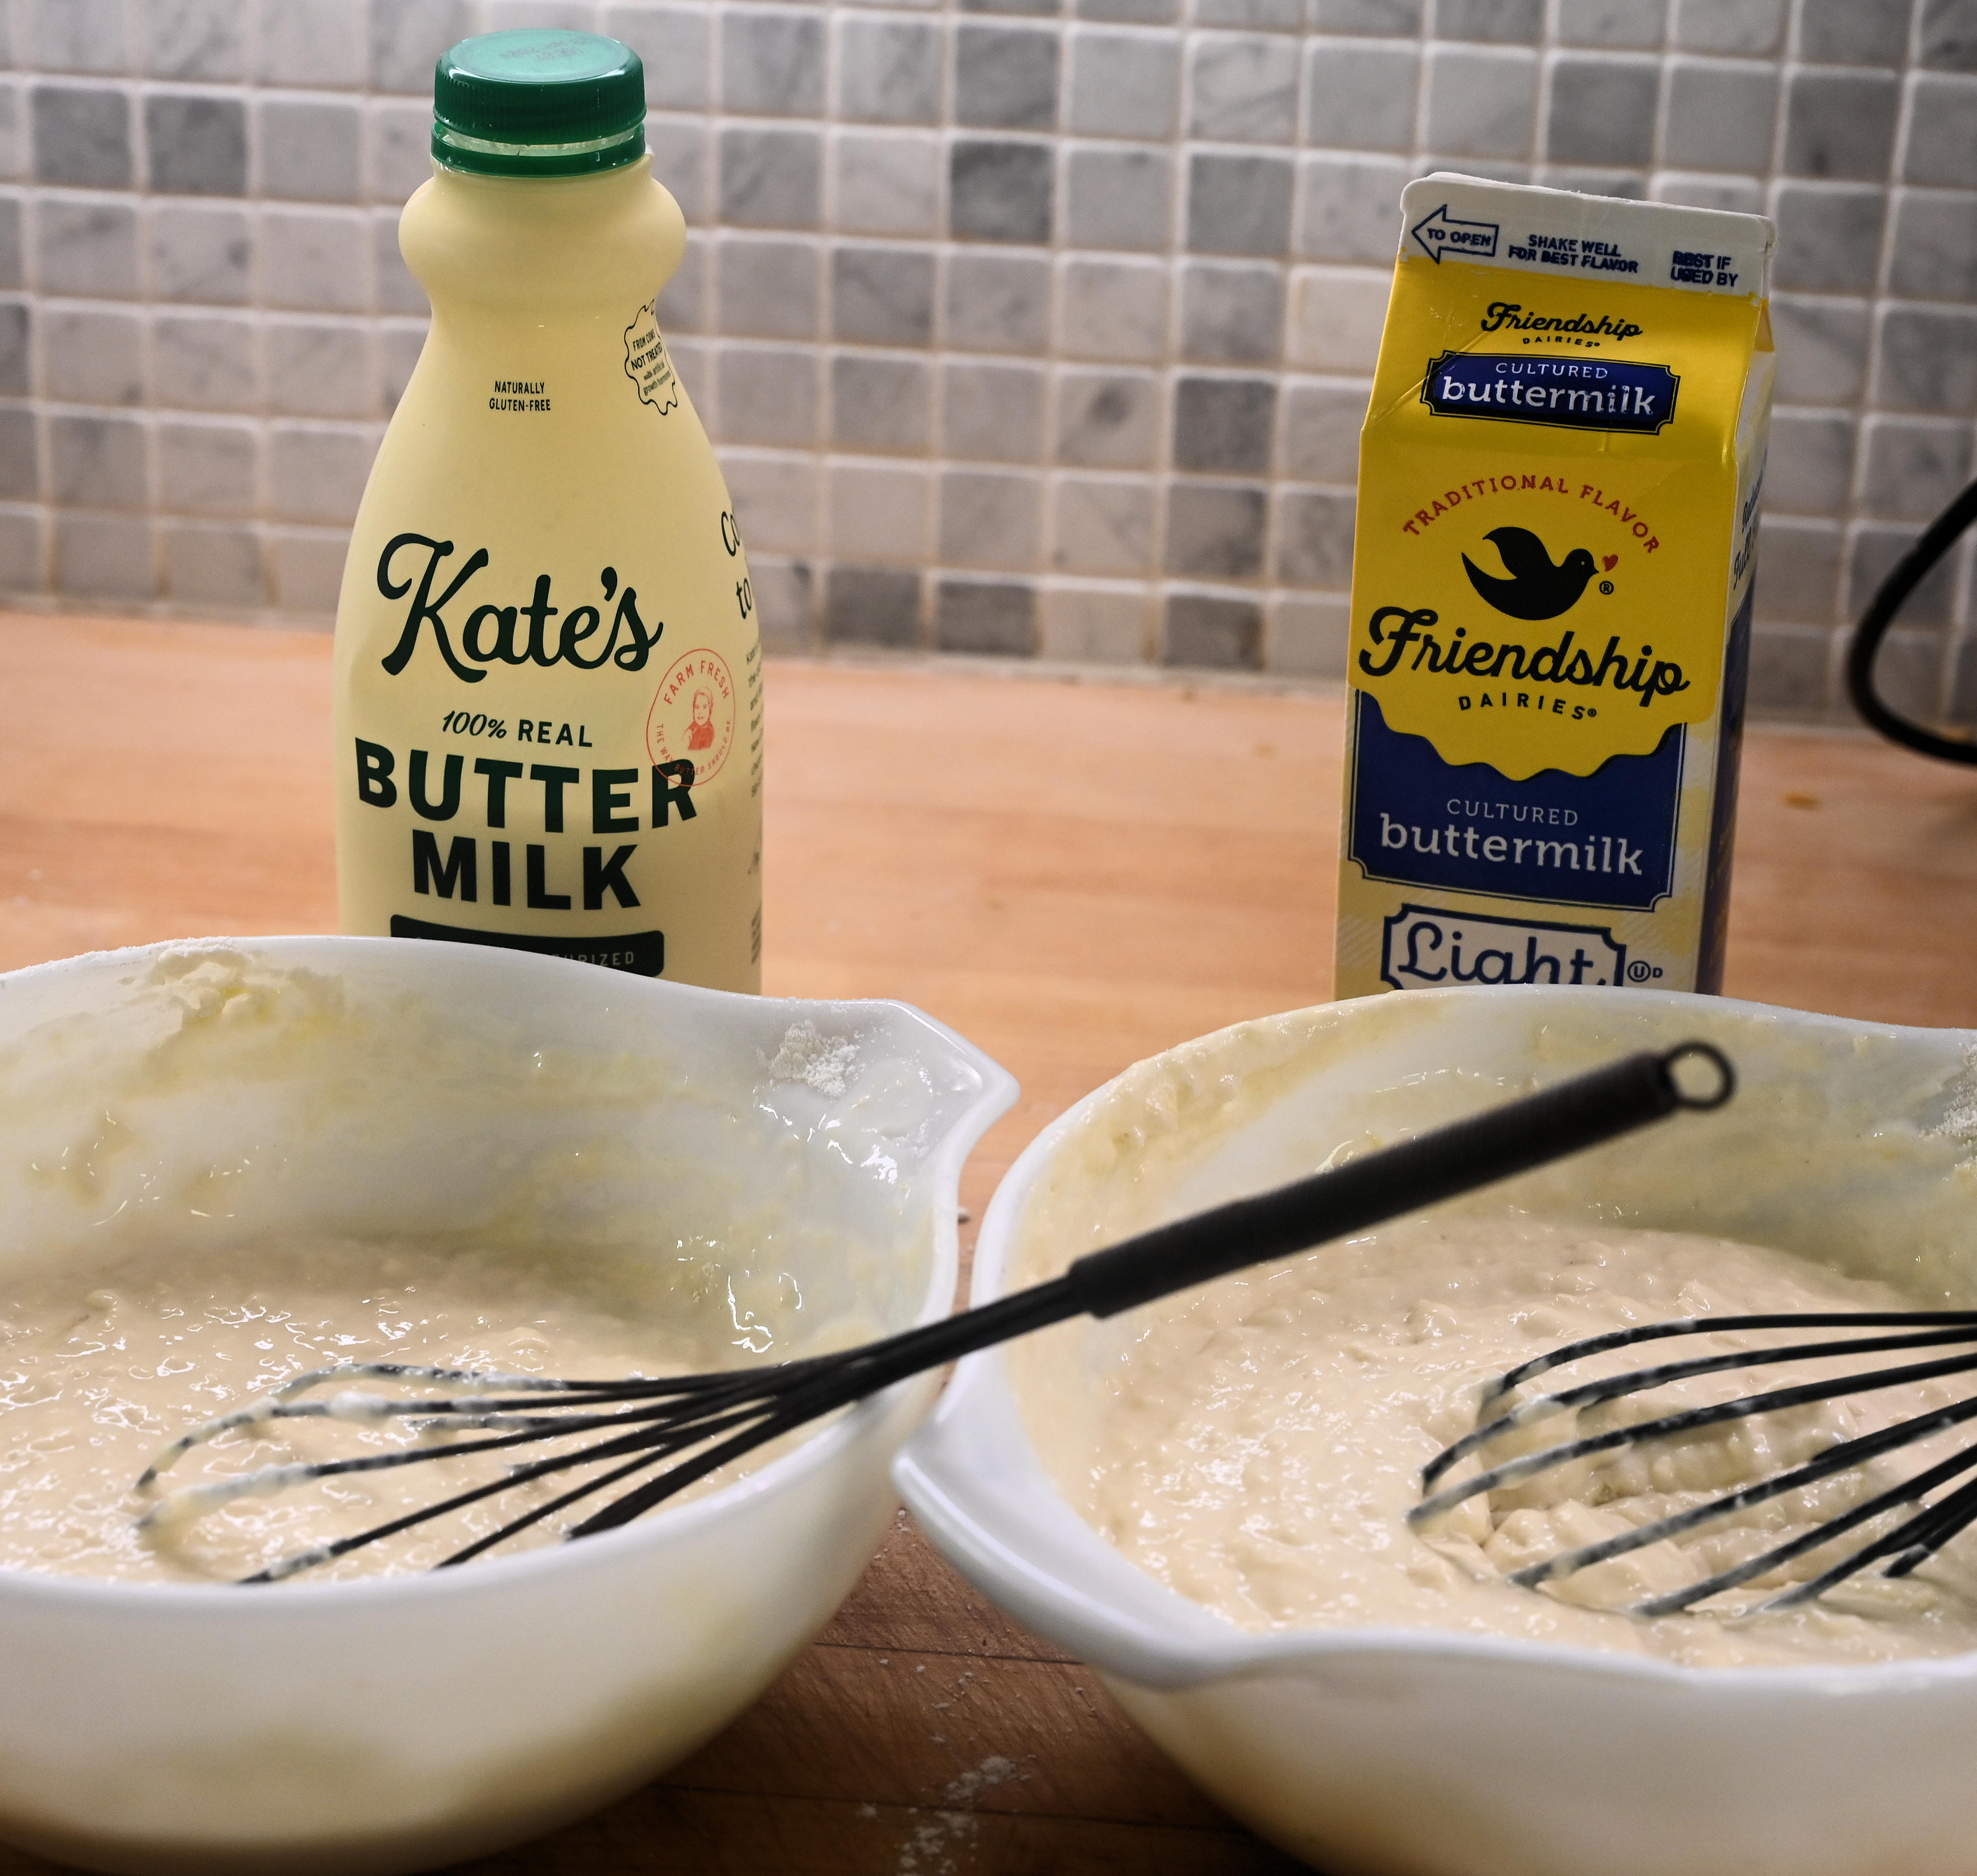
So, it seemed like a good idea to compare the two. We made up two identical batches of dry ingredients and eggs, and added buttermilk to each until we reached a “thickish batter” stage. We initially cooked 4 pancakes on each time on our Presto griddle. But recognizing that the griddle’s heating was uneven and measurement of each pancake aliquot was difficult we then simply put one carefully measured ¼ cup of batter on the griddle from each recipe, and placed them close together so they would have the same cooking temperature.
The result:
The pancake on the right, made with Friendship cultured buttermilk, clearly rose higher than the one made with Kate’s buttermilk. We would assume then that the Friendship buttermilk is slightly more acidic and reacts with the leavening more that the Kate’s recipe did.
How did they taste? We tasted a slice of each pancake without any added butter or syrup. The Friendship pancake had a rich buttery-milky flavor, but the Kate’s pancake was quite bland, with no distinct flavor at all.
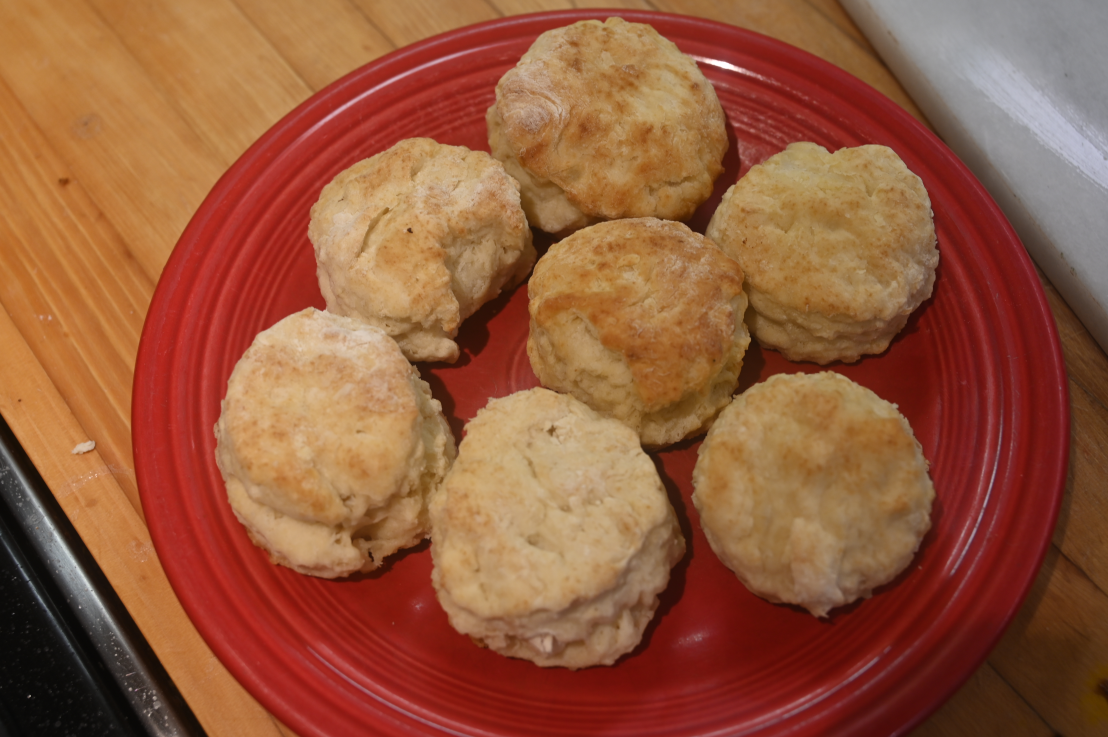
So, how do the two buttermilks themselves taste? Not surprisingly, the Friendship buttermilk tasted more like buttermilk. The Kate’s just tasted sour. No real butter-milky flavor at all. So, we are sticking with the Friendship for our pancakes. An experiment with biscuits showed similar differences in rising as well.
Sorry to say, despite all the positive press Kate’s has gotten, we found it quite disappointing.
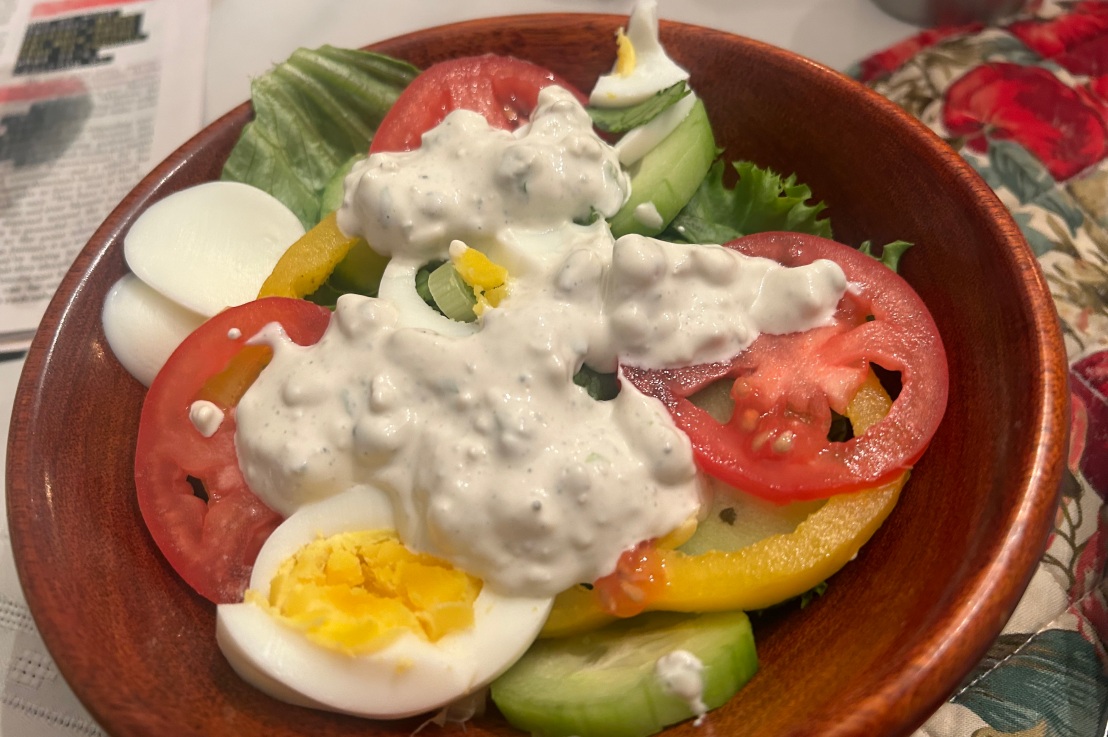
Blue cheese dressing is really easy to make, and a lot tastier than packaged dressings. It only has 3 main ingredients, and perhaps three or four possible additions. Here’s our recipe, culled from several we looked at. We adjusted the flavor a bit using the additions, and you can do the same. Just taste the dressing and decide if it needs any more enhancement.
¼ cup sour cream
¼ cup mayonnaise
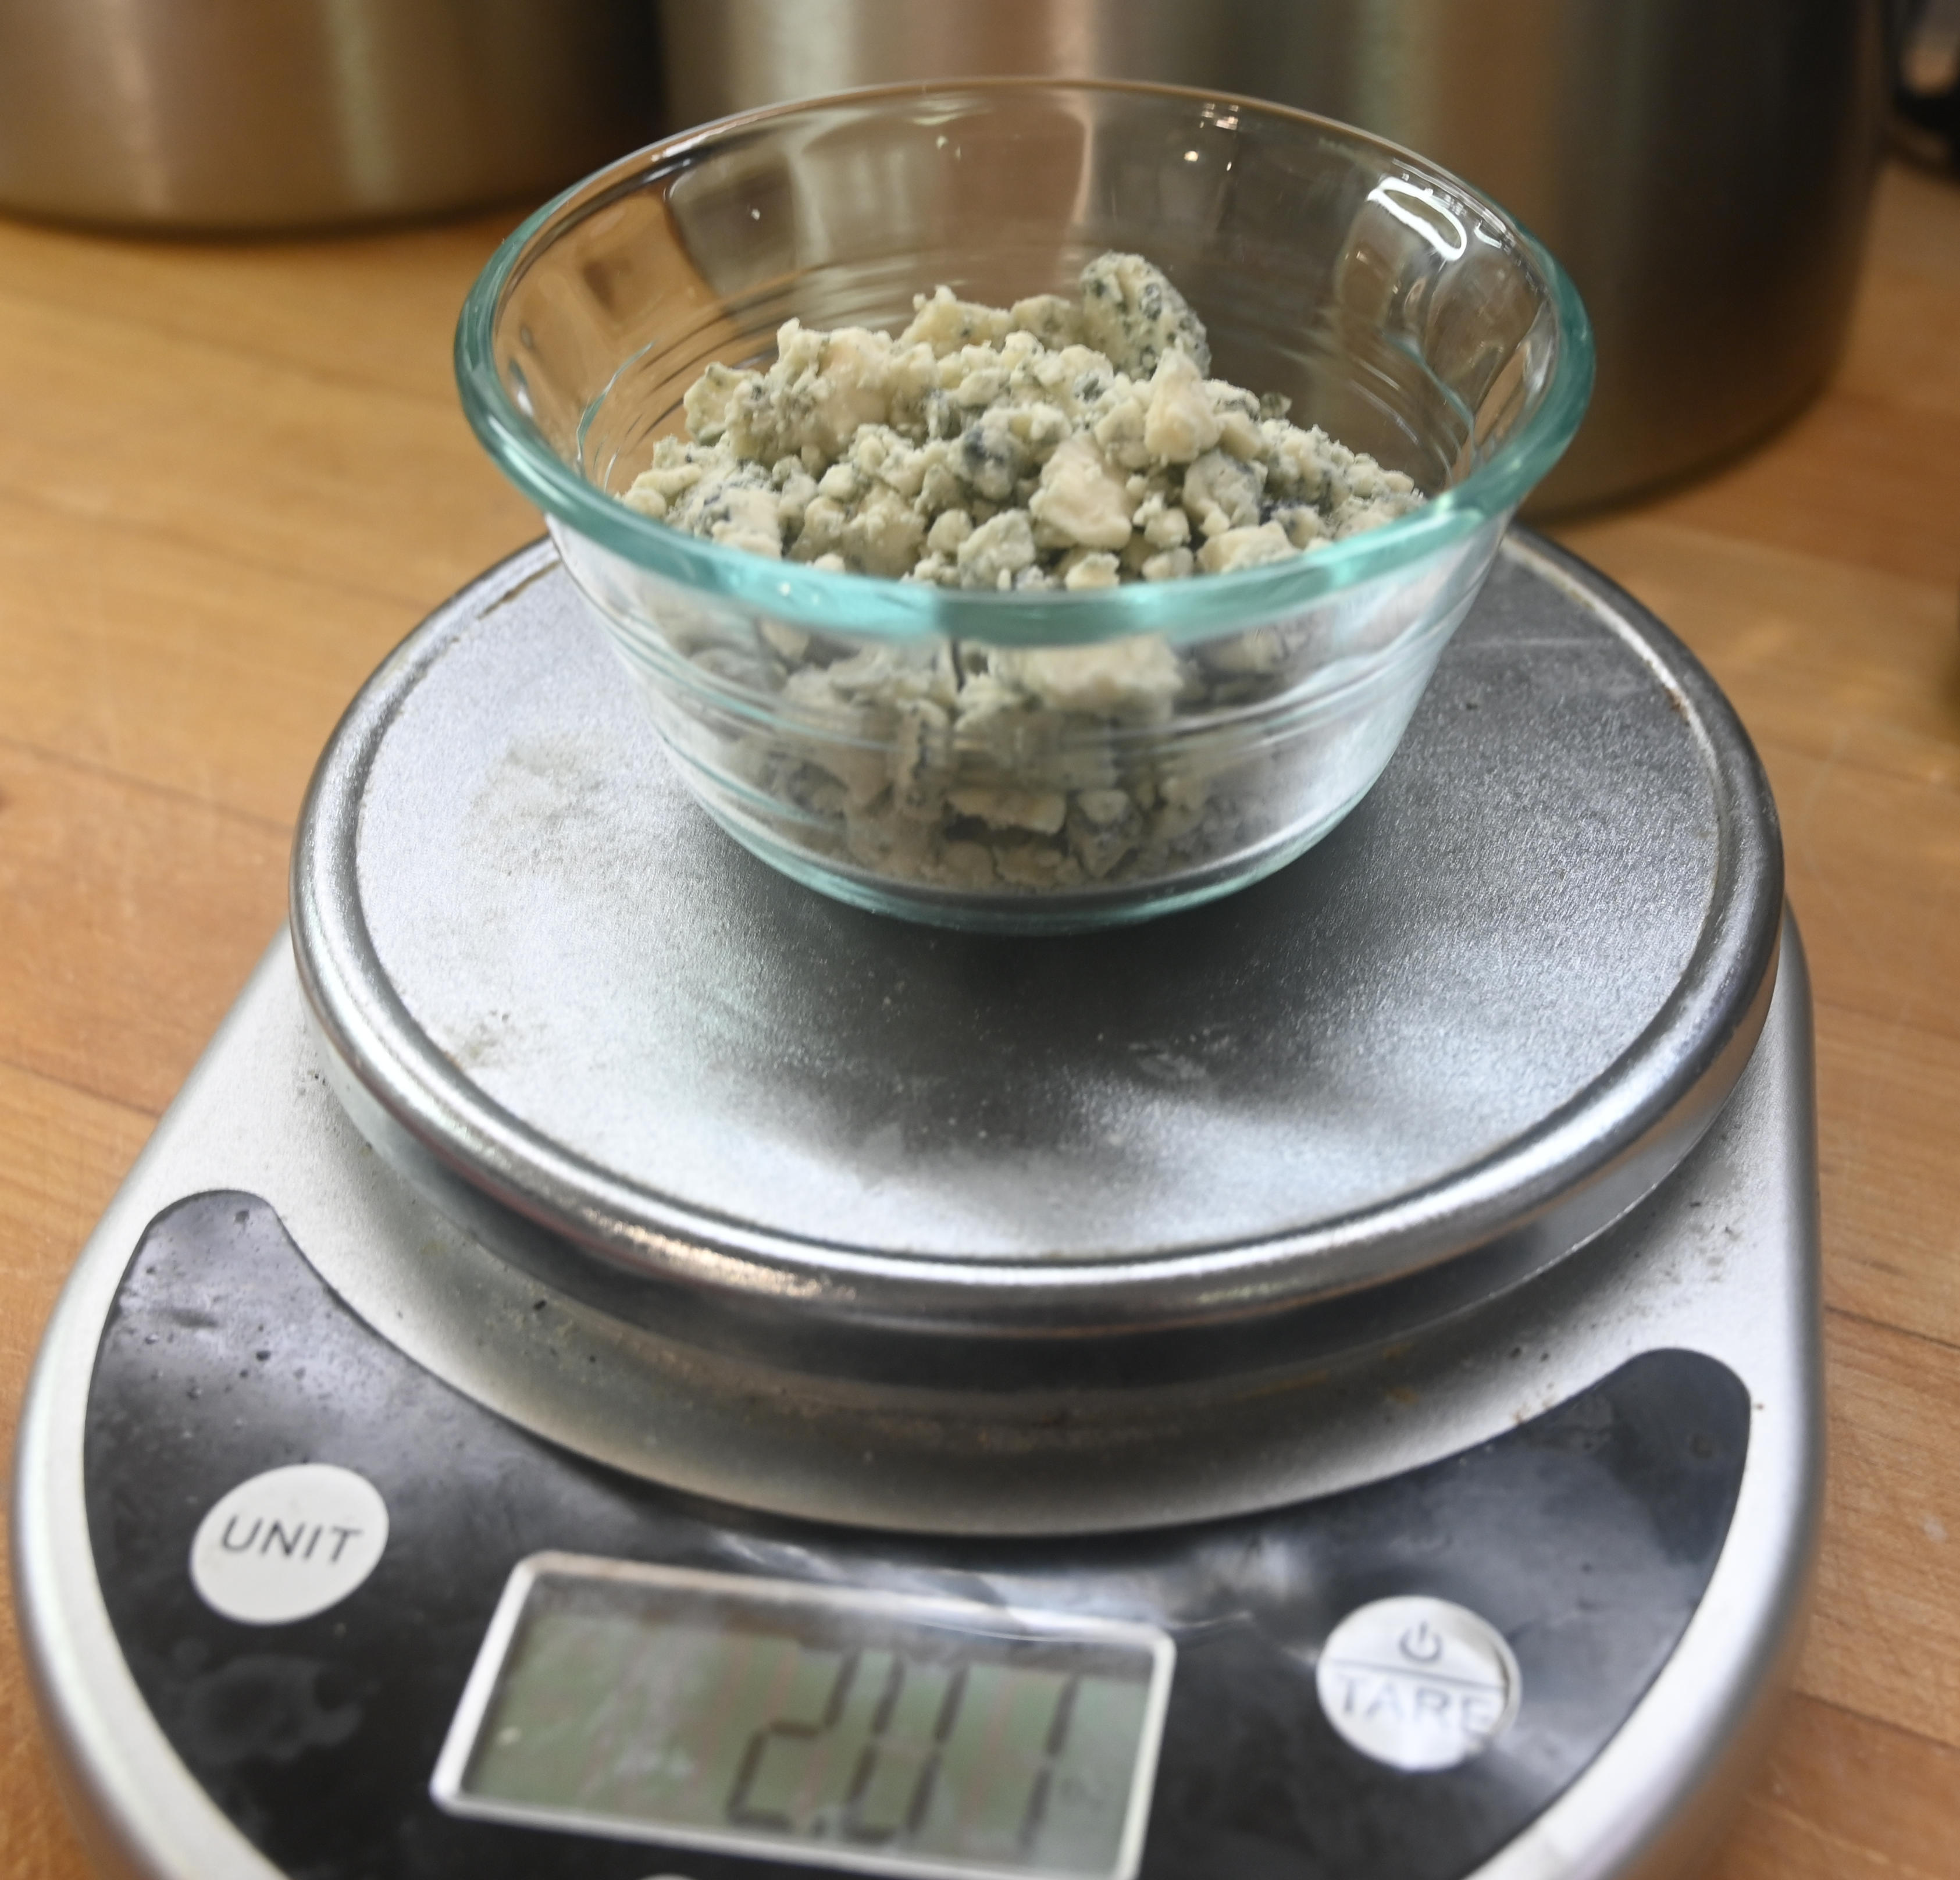
2 oz blue cheese
1 Tb chopped Italian parsley or celery leaves
1 tsp white vinegar
Dash of Worcestershire sauce
¼ tsp garlic powder
(buttermilk)
Start by mixing the sour cream and mayonnaise in a small bowl and add the blue cheese. Using a wooden spoon, press some of the cheese pieces against the side of the bowl to dissolve them and give the dressing more flavor. Mix in the parsley.
Taste the dressing. It would probably benefit from the tartness of white vinegar, Add the vinegar, and taste again.
If you think it needs a bit more edge, add the Worcestershire sauce.
Taste again. If it still seems a bit bland add half the garlic powder, and the rest after tasting again.
Feel free to experiment to get the taste you prefer. The proportions above lead to a nice, tangy sauce. If you like it a little thinner, stir in some buttermilk. We liked it the way it was.
You can get a more full-bodied flavor by using Gorgonzola over plain blue cheese. But in any case, you have made up your blue cheese dressing in about a minute. Enjoy it.
We have written several times about making a chicken pot pie using an Instant Pot. Briefly, you steam the chicken under high pressure for 15 minutes, and then cut the meat off the main pieces and refrigerate it and toss the bones back into the pot with the backs and wings, add 4 cups or so of water, a leek, carrots and celery and pressure cook for 30-40 minutes more to make the chicken stock.
Then making the stew itself amounts to cooking some carrots and celery pieces in butter for 10 or so minutes until soft, sauteing a few mushrooms in butter in a large pot, adding veggies and making a flour-butter roux and slowly adding broth from the pot until you have a nice thick gravy. Then add a little cream for richness and throw in the chicken meat. Then you bake it to make a pie.
If you make biscuits and put them on top of the chicken stew, it’s a pie or chicken ‘n’ biscuits. If you make biscuits and serve the stew over the biscuits, it’s chicken a’la King. And if you put the stew into little casseroles and top with a puff pastry crust, it’s a chicken pot pie for sure!
But what if you want a pie with a nice flakey, buttery crust? Well, this doesn’t take a lot of time except that you really must chill the pie dough for an hour to keep the butter from melting prematurely. The rest is easy.
You can find a bunch of buttery piecrust recipes by a simple search, and they all more or less require 2 sticks of butter, salt and 2-1/2 cups of flour and some ice water. But there are some differences. The important advance in ideas about butter crust came from a relatively recent article by Kenji Lopez-Alt in Serious Eats. In it, he theorizes that the flakiness of piecrusts come from fat coating the flour, rather than the other way around. And, that you should coat the flour with fat and then add the rest of the flour to interleave flour and butter in the crust. This works really well. One writer, writing for Inspired Taste, explained this recipe quite clearly.
Making the piecrust
½ lb (2 sticks) very cold unsalted butter, cut into little cubes
2-1/2 “scant” cups of flour (see below)
1 tsp Kosher salt
6-12 Tb ice water
(for dessert pies add 1 Tb sugar)
The real trick here are those scant cups of flour. One way to achieve it, is to spoon the flour into a measuring cup and then level off the cup with a table knife. That means you have to repeat this 3 times: 2 for the cups and one for the half cup.
A better way is to just weigh the flour out, and forget all that spooning. If you just scoop flour out into your measuring cup, the flour will weigh just about 5 oz or 142 g. If you sift the flour, 1 cup will weigh about 120g. But if you use that spooning technique, you will have only about 112 grams in a cup. This is about 4 oz instead of 5. So, it really is a scant cup.
But instead, why not just weigh it to start with? Let me note that I use King Arthur flour which may be more or less dense than some other flour, But the weight will still be what you use.
Use a food processor
The easiest way to make this crust is in a food processor. If you don’t have one, you can use a pastry blender for about a minute instead. I did it both ways. They both work fine.
Add 168 g (1-1/2 scant cups) of flour to the food processor (or bowl).
Add the salt (and sugar if a dessert) and pulse or stir briefly to mix.
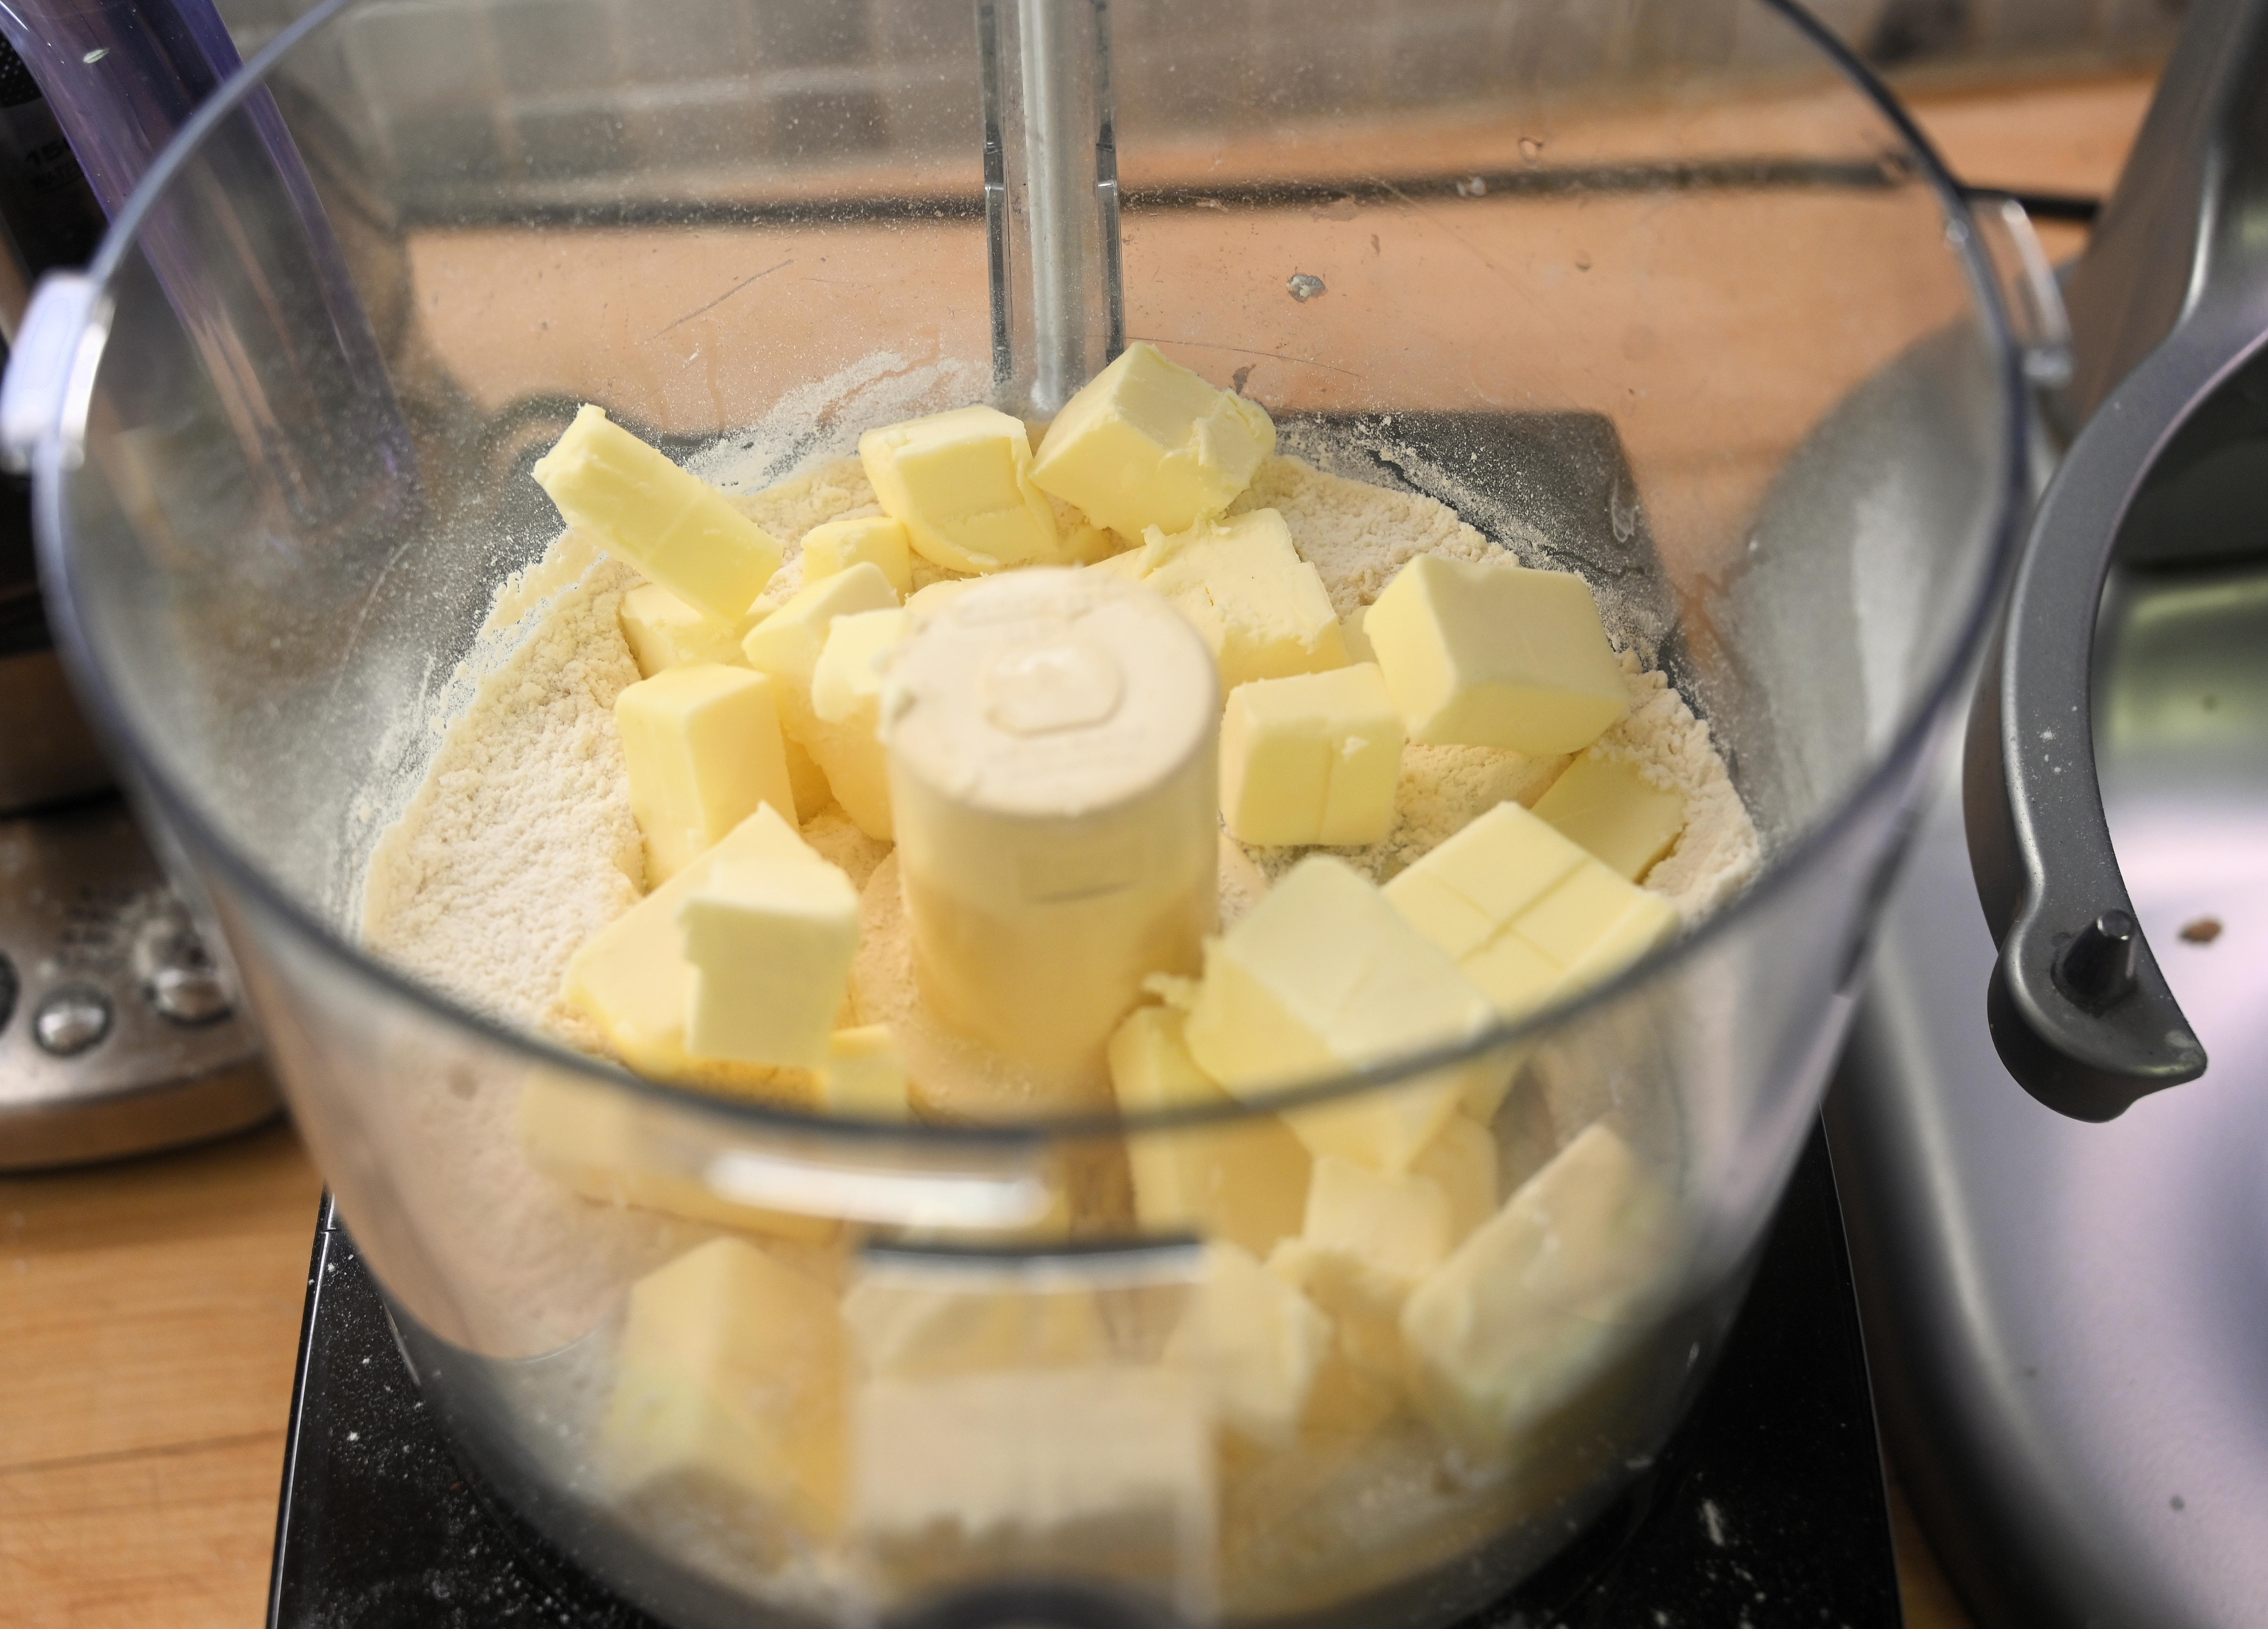
Lay the cubes of very cold butter on top of the flour and mix it in by running the food processor for around 15 seconds. You now have the fat coated flour. You should be able to pinch some together and have it hold its shape. Lacking a food processor, just work the butter into the flour with a pastry blender.
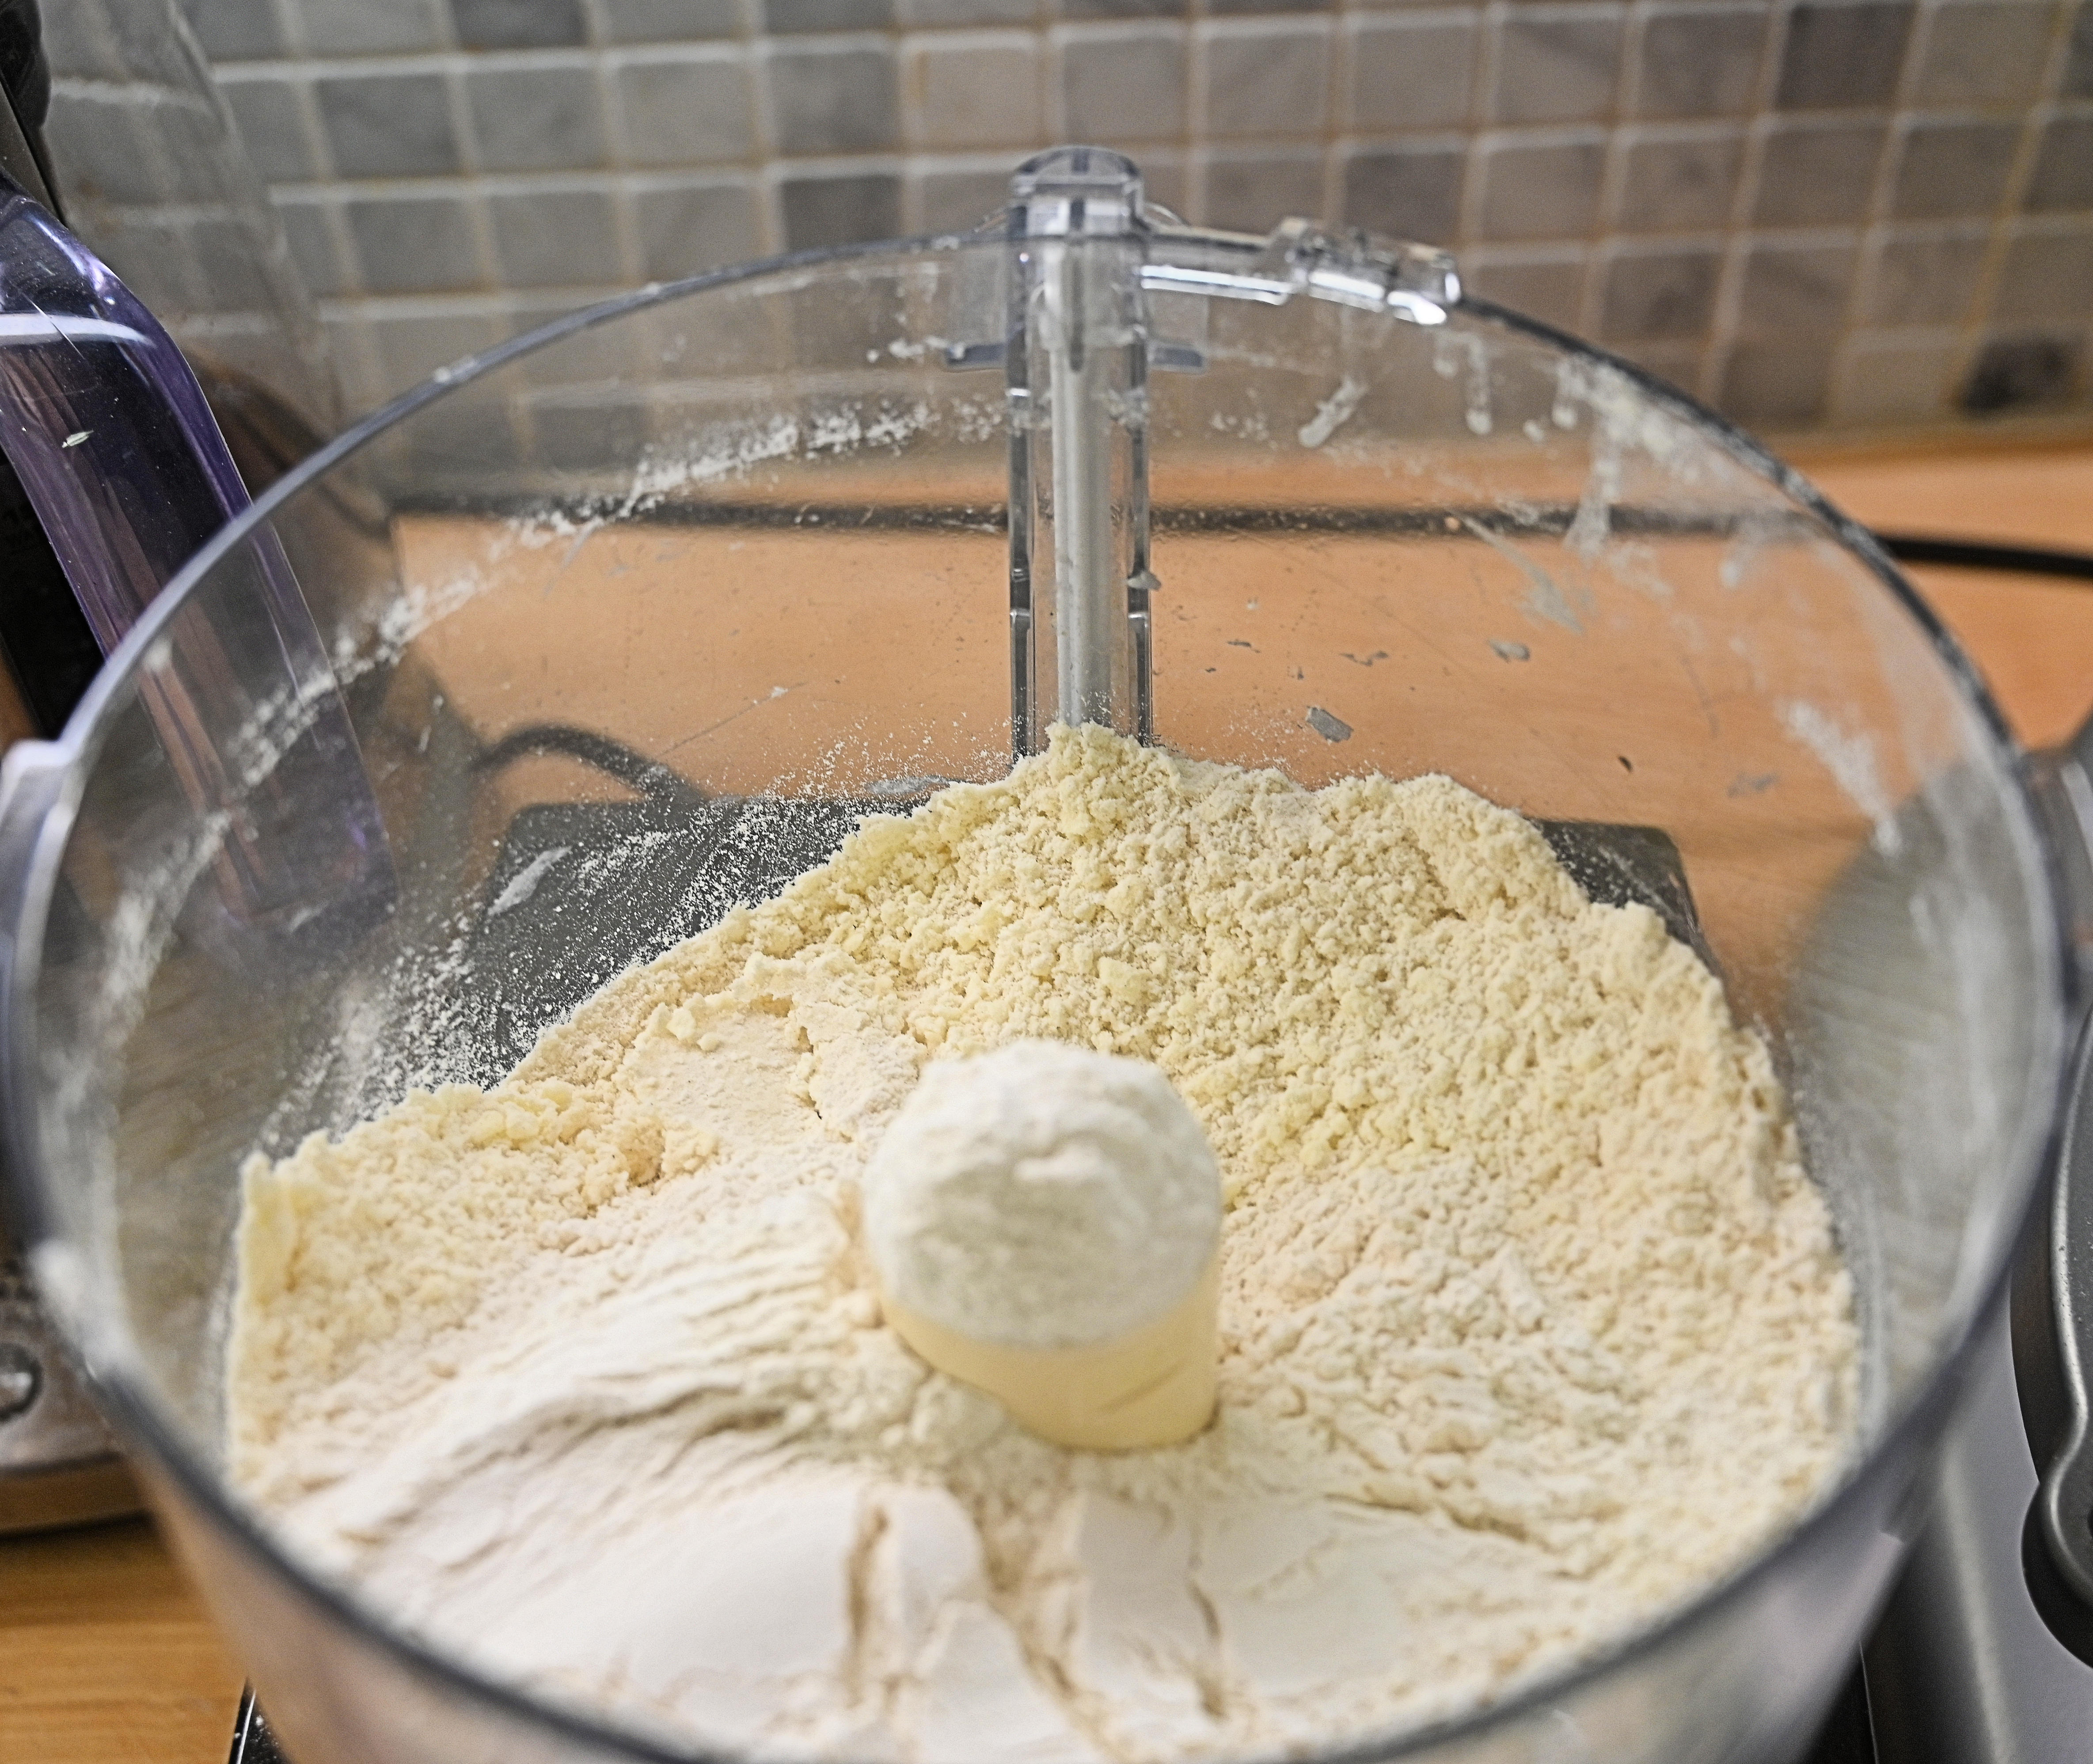
Add 112 g more flour (another scant cup) and pulse for a few seconds to mix the buttery flour with the new flour. (Or mix with a fork or pastry blender.)
Turn the flour mixture into a bowl and sprinkle ice water over it, starting with about 6 Tb of water. Mix together with a fork or rubber spatula.
Keep adding tablespoons of ice water and mixing until you can press the dough together in the bowl with your spatula and it will hold its shape. Depending on the flour and the humidity, this may take 12 or more tablespoons of water. In a warm kitchen in warm weather, you may have to refrigerate the dough during the ice water mixing process.
Take the flour out of the bowl and mound it into a ball. If it crumbles, put it back in the bowl and work in a little more icewater.
Cut the ball in two, press each one into a thick pancake, wrap with plastic wrap (or use a zipper bag) and refrigerate for at least an hour. The dough will keep for several days, and you can freeze if you want to.
When you are ready to make the pie, take the dough out of the refrigerator and let it warm for a few minutes. Preheat the over to 375˚ F (206˚ C).
Then place it on a floured surface or pastry marble and press it slowly across the dough with a rolling pin until it begins to give. Then start rolling it out until the dough is wider than your pie pan. Fix any cracks by pinching them together.
Then fold the dough into quarters and lift it into the pie pan and arrange it with the extra dough hanging outside the pan. Don’t cut it off yet.
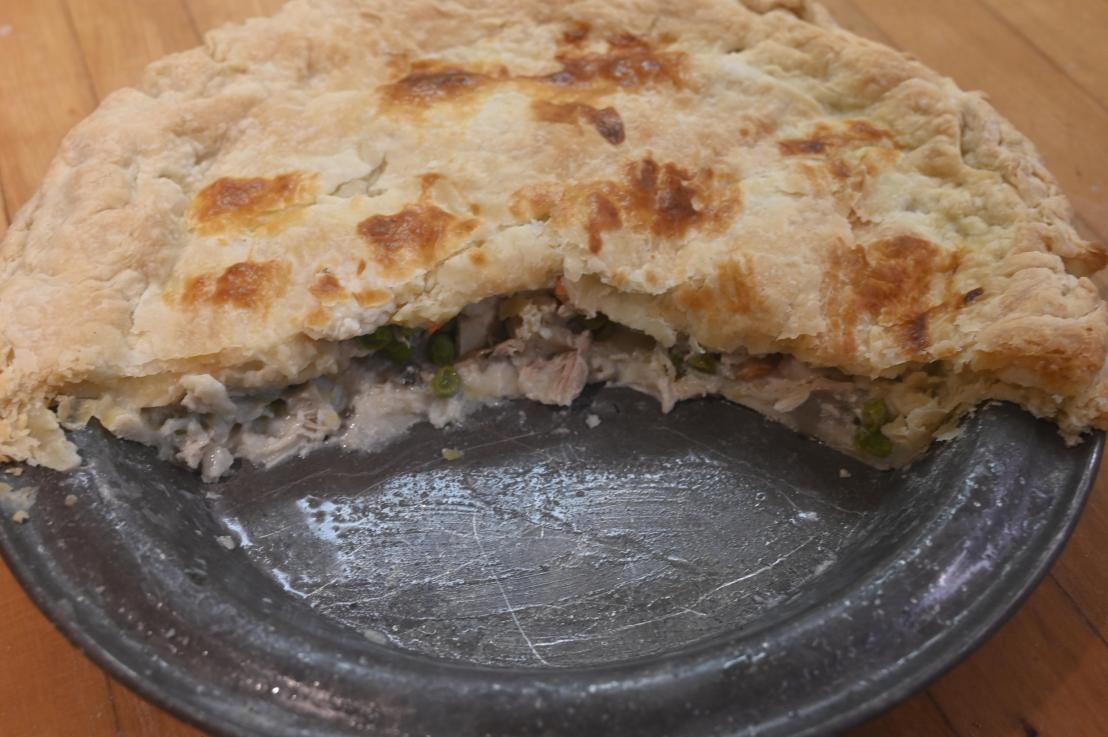
Pour the chicken stew into the pie pan, roll out the top crust and lay it on top of the pie. You may not need all the stew. Freeze the rest for another pie later.
Fold any extra dough from both crusts under the top crust and then go around and pinch the border to look a little decorative.
Cut a couple of long slits in the pie and put it in the oven.
Bake for 15-20 minutes, until the pie filling is bubbling. Serve hot.
You will have made a delicious, flakey, buttery piecrust that your diners will love. Serves 3-4 people.
You probably know that I am not a fan of Bonnie Garmus’ error riddled book, but I thought maybe they would clean up all that mish-mosh in the TV series. After all, there are probably hundreds of people working to produce this series based on the book. Foolish me. It’s worse.
I admit I could barely get through one episode, not only because of the scientific errors, but because Elizabeth Zott’s overwhelming paranoia about being mistreated as a woman is so overplayed. And all of the men in the lab are treated as ignorant, overbearing boors, laying it on pretty thick.
The scientific babble about phosphate rings and the like is better than her talking about covalent bonds in the book. But it’s pretty clear that the actress (Brie Larson) has no idea what any of that babble actually means as she races through it.
The writers took an incident from later in the book where she is a TV cooking show host and moved it into the preliminary scenes as a teaser of what is to come. In the book, she tosses out some canned soup because it if “full of chemicals,” but in this scene she adds “bad chemicals” and implies they will kill you. This is utter nonsense, of course, and nothing but pandering to the fears of the uneducated. The FDA regulates additives and preservatives, and no one is going to die!
Zott tells people that she is interested in abiogenesis, or how life began. But she never mentions that we have a pretty good idea how it began. She should know as every chemist does, about Wohler’s syntheses of urea from inorganic starting materials in 1828, showing that there is no difference between living and non-living compounds.
Soon after that, she is shown beginning her own after-hours research and discovering that the bottle of a compound she needs is empty. So, she sneaks into Calvin’s lab to get one of his. We soon learn that she needed some ribose (a simple sugar) for her experiment. But the bottles they show are narrow necked brown bottles, which would be unlikely to be the container for ribose, a white powder. And, in fact, it would be in a commercially labeled wide mouth bottle, because it was easily available from chemical supply companies. Today, it is sold as a dietary supplement, so anyone can see that it is a powder by a simple search.
Just to extend Zott’s humiliation, Garmus throws in a beauty contest for the secretaries, and Zott is asked to join. All of the secretaries are portrayed as ridiculously stupid, which is simply unreasonable. They are working in a research lab and have to know what they are doing. This would never happen in any company, not even in 1951!
Zott and Calvin join up in the same lab before the first episode is over, and Zott reorganizes the lab to make things easier to find. She put all the spatulas in a beaker near the sink. But the spatulas they show are the kitchen spatulas that you might use to spread cake icing. Lab spatulas are considerably smaller, like these:
You’d think someone would check on that sort of thing.
Calvin’s lab is decorated with huge 1-liter and 2-liter round bottoms and Erlenmeyers, all perfectly clean, because the kind of biochemical research they are interested in is actually carried out in very small flasks with milligrams or micrograms of material.
He is also shown eating food (mostly peanuts) in his lab and leaving them on lab benches, where both he and Zott help themselves. This is a lethally dangerous idea and again would never happen in any real lab. You don’t eat on the lab bench (or preferably at all) in the lab!
Calvin is also shown showering under the lab safety shower. This is very cute, but they don’t work that way. Once you pull the chain, they stay on until you reach up and turn off with the lever. They are made to drench you if you spill something dangerous on yourself. And they can’t be enclosed like that: they have to be accessible from anywhere in the lab within 10 seconds.
And finally, Larson mispronounces citrate with a long “I,” saying sy-trate instead of sit-rate. Surely someone on the staff would know better than that. This is just embarrassing.
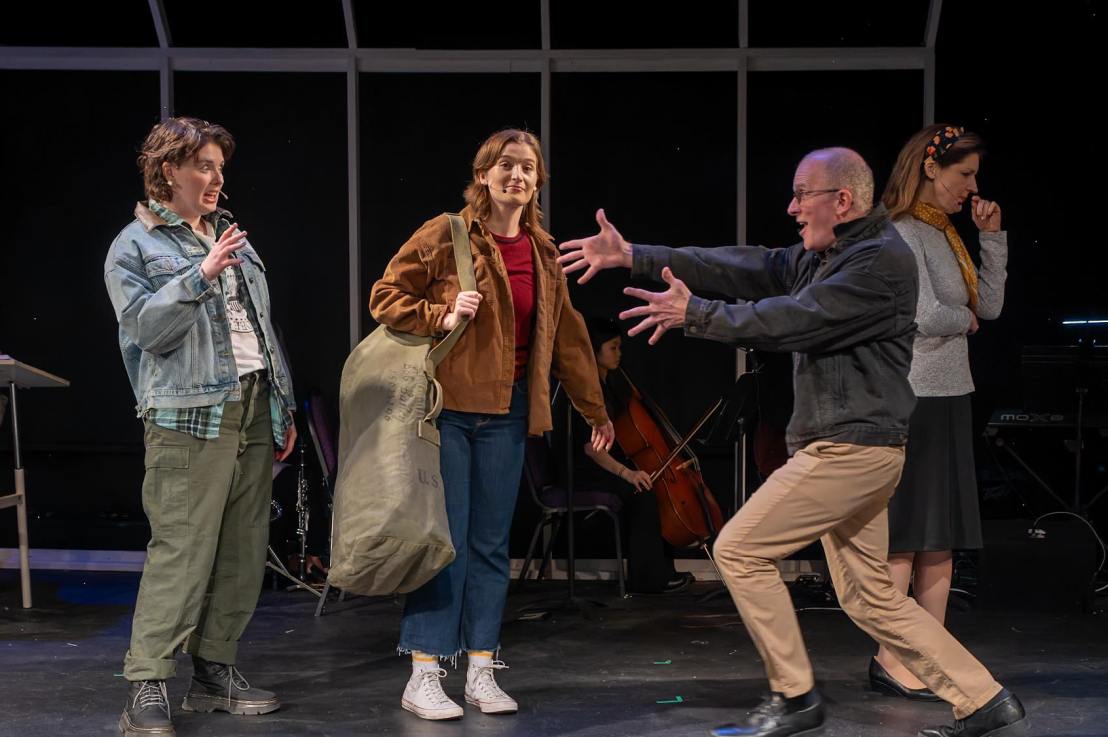
Fun Home is a delightful musical by Lisa Kron and Jeanine Tesori, based on Alison Bechdel’s graphic novel, also called “Fun Home.” The musical won 5 Tony’s in 2015, including Best Musical and Best Score. It’s about Bechdel’s like growing up adjacent to the funeral parlor her father runs and about her coming out as a lesbian, and her father discovering he is gay. (The family refers to the funeral parlor as “Fun Home.”)
The Brookfield production is simply outstanding, with a 7-piece orchestra directed by Sarah Fay accompanying the cast of 9 actor/singers. We saw the preview performance last night. For us, Tesori’s music was the best part, with complex choral lines and harmonies throughout, as well as a few lively comic numbers like ”Come to the Fun Home” sung by the kids, and “Raincoat of Love,” sung by the whole company.
The story is led by Janice Gabriel as the grown-up Alison, who plays a warm and relatable character who describes her profession as “lesbian cartoonist.” She comments on the various scenes and offers captions, as if they were her drawings, joins the cast in singing several numbers.
The show also has a Small Alison, who is Alison at around 8 and Medium Alison, just off to Oberlin College. (Bechdel graduated from Oberlin in 1981 with a degree in Fine Arts.)
Harriet Luongo as Small Alison leads several numbers with enthusiasm and a strong, clear voice. And Hannah Rapaglia as Medium Alison has two lovely solo numbers as she begins to discover her sexuality and falls for her girlfriend Joan, played with outgoing honesty and charm by Erin Walsh.
Tony Bosco-Schmidt excels as Alison’s father Bruce, who varies from kind and fatherly to impatient and unforgiving as he deals with his own coming out problem. He has a lovely singing voice in the group numbers and in his closing song “Edges of the World,” just before he dies.
Denise Milmerstadt is a strong player and singer as Alison’s mother Helen and is especially affecting in “Days and Days” near the end of the show.
Mason Sacco does quadruple duty in several small parts including being the teenager Bruce seduces, but as Bobby Jeremy, he leads the company in the delightful crazy, jazzy number “Raincoat of Love.”
As Alison’s two younger brothers Christian and John, Jack Hoyt and Sawyer Delaney are lively and vivacious, and sing very well in numbers with Small Alison.
Every cast member in the production is top-notch in their singing and acting, and the directors (Bennett Cognato and Rob Bassett) should be congratulated in putting together this complex show so well.
Fun Home at the Brookfield Theatre is an absolute delight, and you shouldn’t miss it! Performances begin tonight, December 1, and play Fridays and Saturdays for 3 weekends and Sundays at 2pm on the first two weekends.
[Pictures by Stephen Cihanek of the Brookfield Theater]
Ask anyone who played an instrument about their experiences at Columbus, Ohio’s North High, and they would be sure to mention Les Susi first thing. While North High had plenty of gifted teachers, Les was a unique influence on so many lives. He was a teacher, a leader, a coach, a fine musician and a good friend. Let me tell you about how I met Les Susi.
In the spring of my 9th grade year at Crestview Junior High, Les came to all the junior high schools to audition kids for the high school band and orchestra. There was also a Junior Band for those who weren’t quite ready. I was thrilled to learn that I made it into the Concert Band and amazed to learn that included being in the marching band during football season.
Practice for the marching band began in the last two weeks of August, two weeks before school started. We rehearsed from 8am-noon 5 days a week for two weeks, learning how to march and play together. Unlike New England where late August begins to cool off, the last two weeks of August in central Ohio were really hot! So, we did our outdoor practice first at 8am when it was cool and came inside later to work on music.
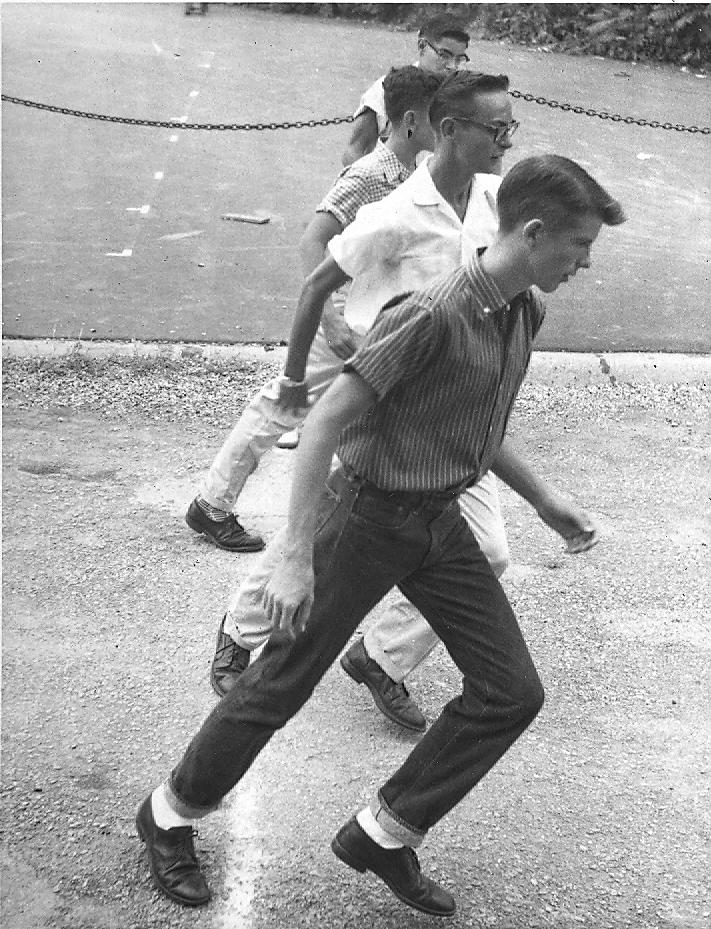
If you’ve watched military parades, the soldiers basically walk using the same sized step, usually around 30 inches, or 6 steps in 5 yards (180 inches). Marching bands mostly march using shorter 22.5” step, so you get 8 steps in 5 yards. This gives you time to pick up your feet higher, giving a flashy effect called the “piston step” or just “8 to 5.” It also matches the number of beats in 2 measures of a march.
Similarly, the military “about face” just means that you put one foot forward and pivot on the ball of your foot to reverse directions. But a common marching band about face is essentially “one-legged,” where you rotate on the ball of your left foot, while swinging your right leg around to give the momentum that creates the turn. This takes a bit of practice but looks pretty cool.
Marching together means that you all take the same sized steps so that each row marches down the field in a straight line. We practiced this a great deal. Our band had 9 rows of 8 players each, grouped by instrument section. The squad leaders marched on the outsides of each row checking that everyone stayed in line and calling them out if they got ahead or behind. This too took some practice.
The Music
But once it got hot out, we came inside for a break followed by music rehearsals. We were, I think, the first class to benefit from the new air-conditioned band room. (Thank goodness!) All the music we played had to be memorized. We didn’t carry music at all. So, we had to learn our parts for the school march, Polar Pep, the loyalty song (a tedious hymn) and the Star-Spangled Banner in both Bb and Ab, (the arrangements were different, not just transposed) and the National Emblem march.
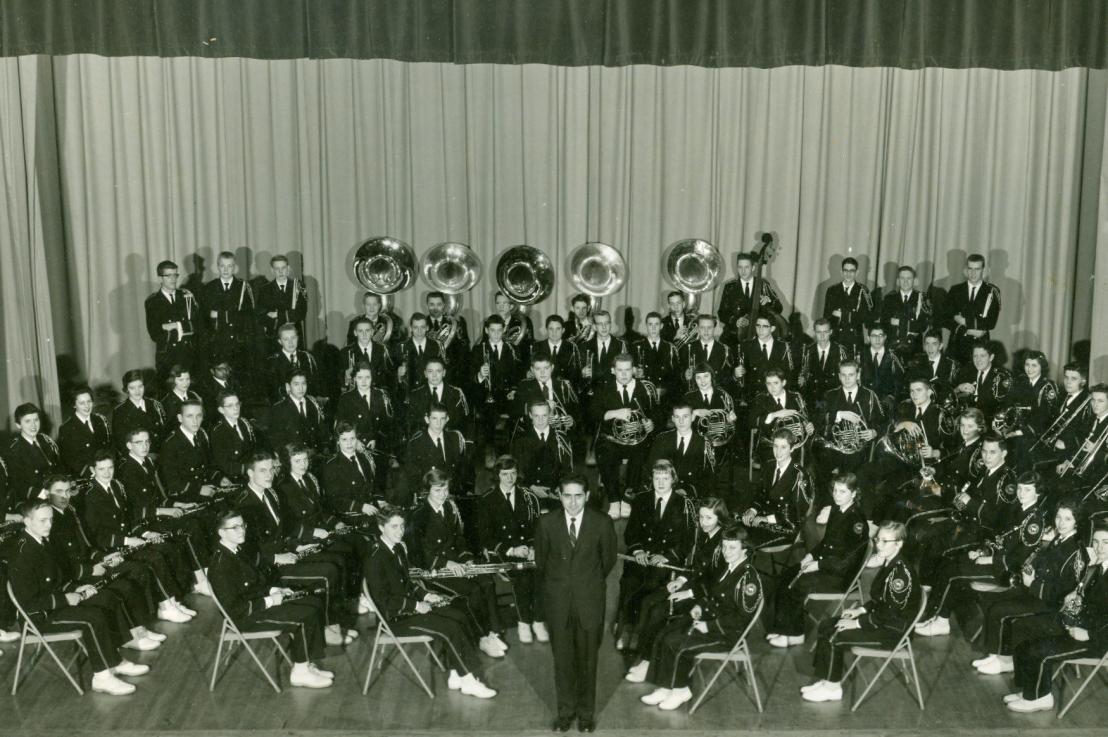
Once we got beyond the basics, we started learning the music (and the formations) for the first half-time show. Again, we not only had to memorize the music, but where we stood in each formation and how we got there. We were in 9 rows of 8 players each, and unlike the Ohio State model, we were not an all-brass band. In addition to trumpets, trombones, baritone horns and tubas, our band included flutes, clarinets, and saxophones (I think both alto and tenor saxes). And of course, a whole row of percussion: bass drum, cymbals and snare drums for sure. Sometimes other percussion instruments sneaked into the half-time shows, too.
The rows had letters, and we were arranged alphabetically but only some letters were used. My row was R row, and we were all clarinets. I think the trumpets were in front. R row was second from the back. When Les gave out the charts for each formation, we were identified by our row letter and number, I think I was R3 the first year. The next year, I was an Asst Squad Leader in R8 and my senior year, I was the squad leader at R1.
So, for every formation, we got a drawing of the field and where each of us stood relative to the yard lines and the hash marks that help officials center the ball. It helped us center the band on the field in the same way, and we knew to head for a spot near a yard line and hash mark. When we first stood in the positions for these formations, Les would sometimes move people a bit to make the formation clearer. We noted that and memorized our positions.
Les was particular and insistent on excellence in our formations, our marching and our playing and let us know if we weren’t doing what he expected. During outdoor rehearsals, he carried a power megaphone to tell us on the field what we needed to do better. He was not above the occasional “dammit” when we screwed up but tried to remember that that carried into the classrooms in the building behind us, and to not swear into the megaphone.
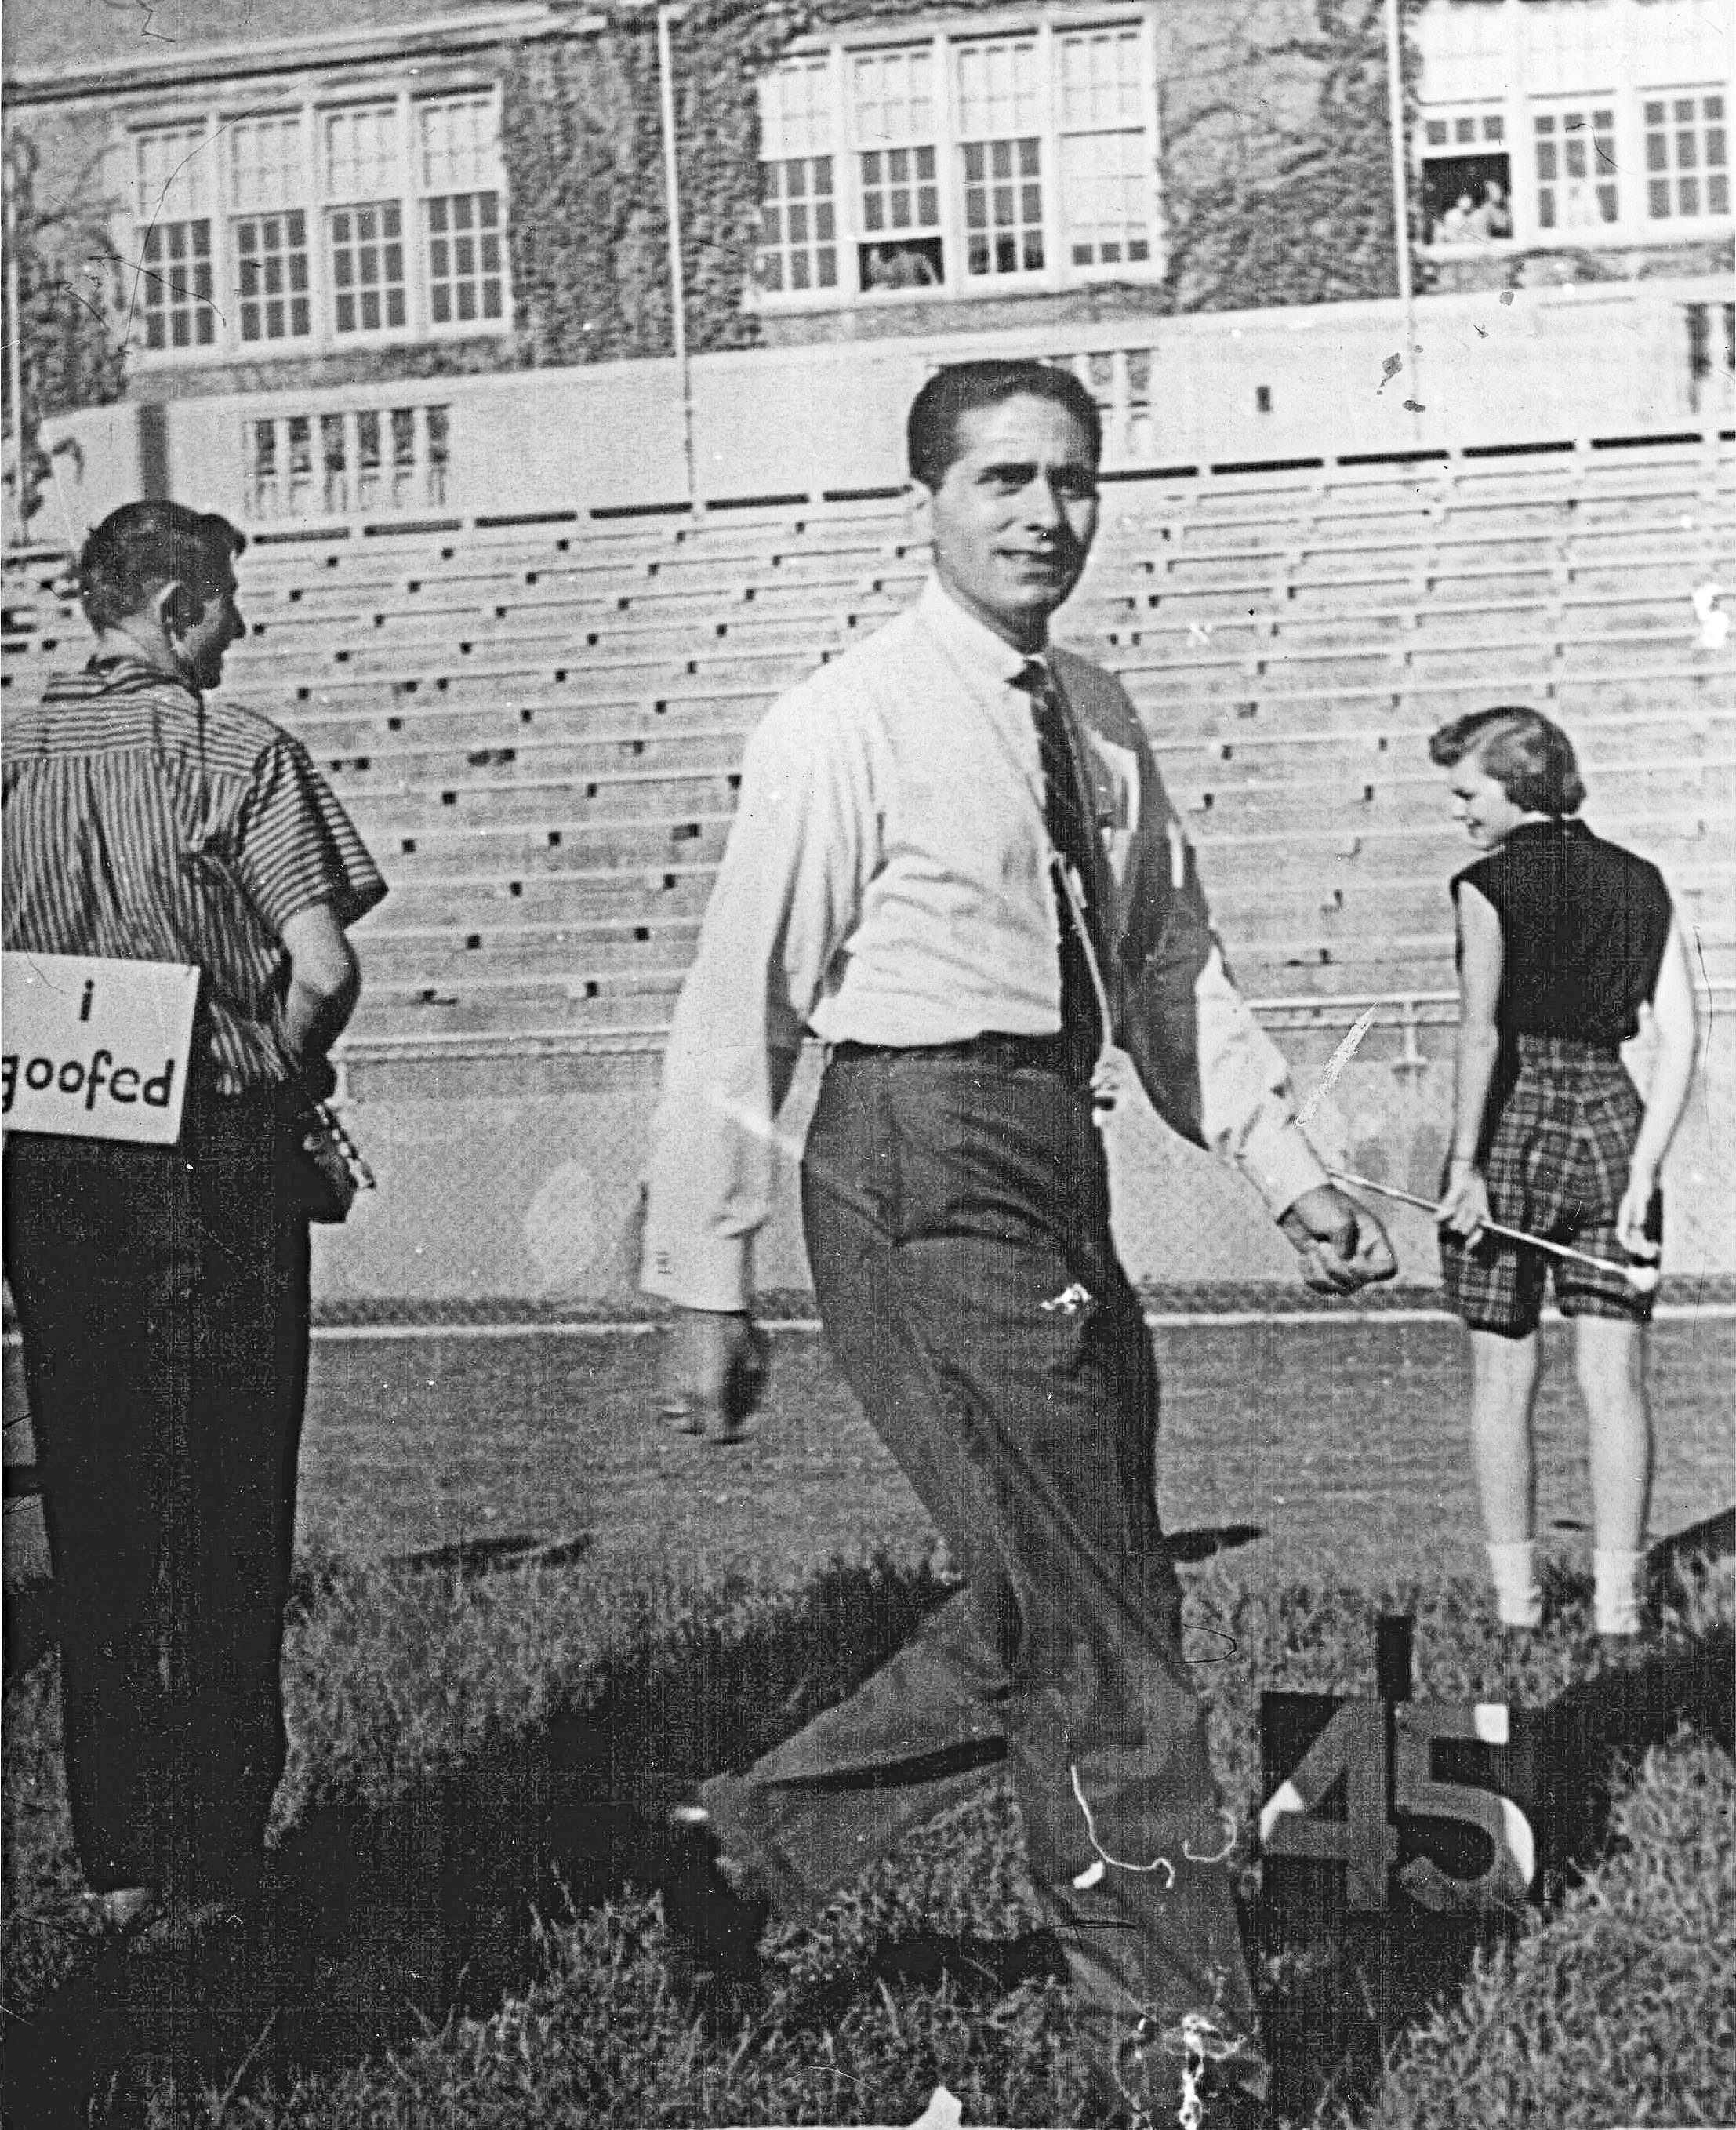
To make sure that we didn’t let our attention wander, the band had several “I Goofed” signs to award players who made errors where they should have known better. I only got one once: I think my Junior year, when I was simply not paying attention. We were supposed to wear them all day, but I soon found that people pulling on the sign and could choke me, so I put it into locker and returned it the next day.
Every half time show had a topic, and we usually had a theme that we played when marching to each formation, as well a song segment we played while in position. We had to memorize all this music each week, but usually these were pretty short. I remember Les’s arrangement of “South America take it Away” was only about 16 bars long.
Les wrote his own arrangements for all the music we played on the field in his inimitable jazz-inflected harmonic style, which often include chords you never heard before in those tunes, including ninth chords and even thirteenths! They were always fun to play once we got our arms around them.
The high school football season was usually 11 games on successive Friday nights, with about half at home and half away. We had to have a new show for every home game, but when we went to away games, we usually repeated last week’s home game show.
When Les started at North in 1953, he brought his experience playing in the Ohio State Marching Band to North, including the pregame ceremony. The band members marched in line into their rows in the endzone to a drum cadence. Then, called to attention, they played the fanfare that starts Polar Pep. You can listen to it here, as recorded by us in 1960. Note the interesting harmonies in the fanfare, clearly written by Les Susi. At the end of the fanfare, during quick chords, the drum major struts through the middle of the band to the front, and then blows his whistle to start the band marching down the field playing the fight song. North was at the time the only high school with an original fight song, composed in the 1930s. But this arrangement clearly had Les’s touch, including a countermelody in the trombones and baritone horns.
When we got to the end other field, the other team’s band joined us, and we played one of two versions of the Star-Spangled Banner, and then marched back while playing National Emblem. At the end of the field, the drum major tossed his baton over the goal posts. During my Junior and Senior years, the drum major was my good friend Jim McDonald. We’d done some theater together and I knew that he was very talented indeed. I don’t think he missed the catch of his baton from those throws more than once in the two years we had him. Jim went on to study music education at Ohio State and eventually became the choir director at Crestview Junior High, and then moved up to assistant choir director at North, and finally became the choir director for a number of years until North was closed in 1979.
One unique formation Les developed for us was Script North, where the band spells out North in script with the drum major leading the way, and players dropping off the line to stand where each letter is formed. It took a lot of practice to get it right, but we always did it at Homecoming, at least. As far as we know, we were the only local high school attempting a script formation at the time.
After working together for 2 weeks in August and 1-1/2 hours every morning, we were a pretty tightly bound group and very proud of our band. In fact, I don’t think any of our competitor high schools quite reached the standards that Les had set for us, and that we mostly achieved.
Concert Band
Football season came to an end just before Thanksgiving, and suddenly we became a Concert Band, not a marching band. We come in at 8:45 for first period instead of at 8am for marching practice, and we are no longer excused from gym classes.
But concert band was a whole new experience for some of us. Les’s musical standards were very high and the music much more complex: it requires fingering and breathing techniques we never had time for on the field. Les said more than once, that it took him at least a month to get us to make the transition to more serious music making.
Instead of playing every Friday night, we now were preparing for Winter and Spring Concerts. And while some of the music is lightweight: some selections from Broadway and Folksong Suite, we also tackled more serious pieces like Gustav Holst’s Suites #1 and #2 for Military Band. We did the first suite my sophomore year and the second suite as part of concerts my junior year.
Here’s a professional recording of Suite #1. The first movement is called a Chaconne, which I gradually learned is a piece where the bass line repeats throughout the movement, as harmonies and other melodies slowly build on top of it. This style of music originated in organ pieces, but Holst shows how well it works for concert band.
We quickly learned that playing indoors in a concert band means playing less loud and more carefully in tune. And the music is considerably more challenging: we spent weeks woodshedding the Holst #1 that year.
Oh, and did I mention State Contest? Each year in the spring, the band jumped on busses to go somewhere to play for judges and get praise and criticism. And a rating. Les’s North High Band consistently received nearly all 1 ratings. Some of our sister schools usually went as well but few scored as high as often as we did. We played a piece of our choice, a piece that was required, and then were asked to sight read a piece we’d never seen before. The conductor was given 3 minutes to study the score, and 3 more minutes to tell us what to watch out for, and then we read through it as best as we could. But because of Les’s skill we often got 1’s in that section too.
During my Junior year, we tackled the Holst Suite #2, which presented different challenges, including a Fantasia that mixed the Irish dance tune, the Dargason with Greensleeves. By this time, I really began to truly appreciate classical music. When you slowly learn a piece as a group and see how it is put together, you begin to see the great power and beauty of classical music. On the other hand, we also played selections from the Music Man that year.
Our Senior year, Les dropped an enormous challenge on us. The American composer Vittorio Gianini was well known in classical band circles for a series of significant compositions, and in 1957 had just published Praeludium and Allegro. We begin tackling this modern, dissonant piece and initially hated it every day. But after a month or so, when we had gotten through its technical challenges, most of us fell in love with it and felt it was one of the best things we’d ever done. Here’s a professional recording. Here’s another version that is closer to our interpretation. Note how the Praeludium theme resurfaces under the Allegro about 6 minutes into the piece. We played it at our Spring Concert and thrilled the audience with it, and took it to State Contest, and got all 1’s.
In case you think that band is all Les did, you might be surprised to learn that he also taught the orchestra, a dance band and a woodwind ensemble. He also taught theory classes, and while I couldn’t schedule that class, he gave me some valuable advice when I got interested in music composition.
In Conclusion
Les Susi was and still is at 94, an amazing musician, teacher and leader. He helped us all grow as musicians and as leaders and taught us a lot about music we would never have learned any other way. When Whetstone High School opened in 1961, Les “was moved” there by Whetstone parent demand. He continued teaching there for 16 years and then was asked to lead the Fort Hayes Arts and Academic High School. He retired in 1986 but was already a member of the Brass Band of Columbus, as cornet soloist, associate conductor and chief arranger. Not only is he the person I remember most from North, he was probably the most demanding and got remarkable results. As my friend Sandy (Helm) Robert said to me, “he strove for perfection and frequently achieved it.”
You can make your own breakfast sausage in just a few minutes and get just the flavor you want. In our version, we leave out the common onion, garlic and hot peppers, which are great in dinner sausages but overpower eggs or pancakes. Instead we add a bit of apple to the sausage, which adds moistness and an interesting accompanying flavor.
We mix the spaced together in a mortar and pestle that we liberated from our chem lab decades ago, but you can easily buy them online. Lacking one, you can chop the spices together with a knife on a cutting board, or use a blender.
1 Tb dried sage
1 Tb dried thyme
1 tsp fennel seed
1 tsp brown sugar
1 ½ tsp Diamond Crystal kosher salt.
1 lb ground pork
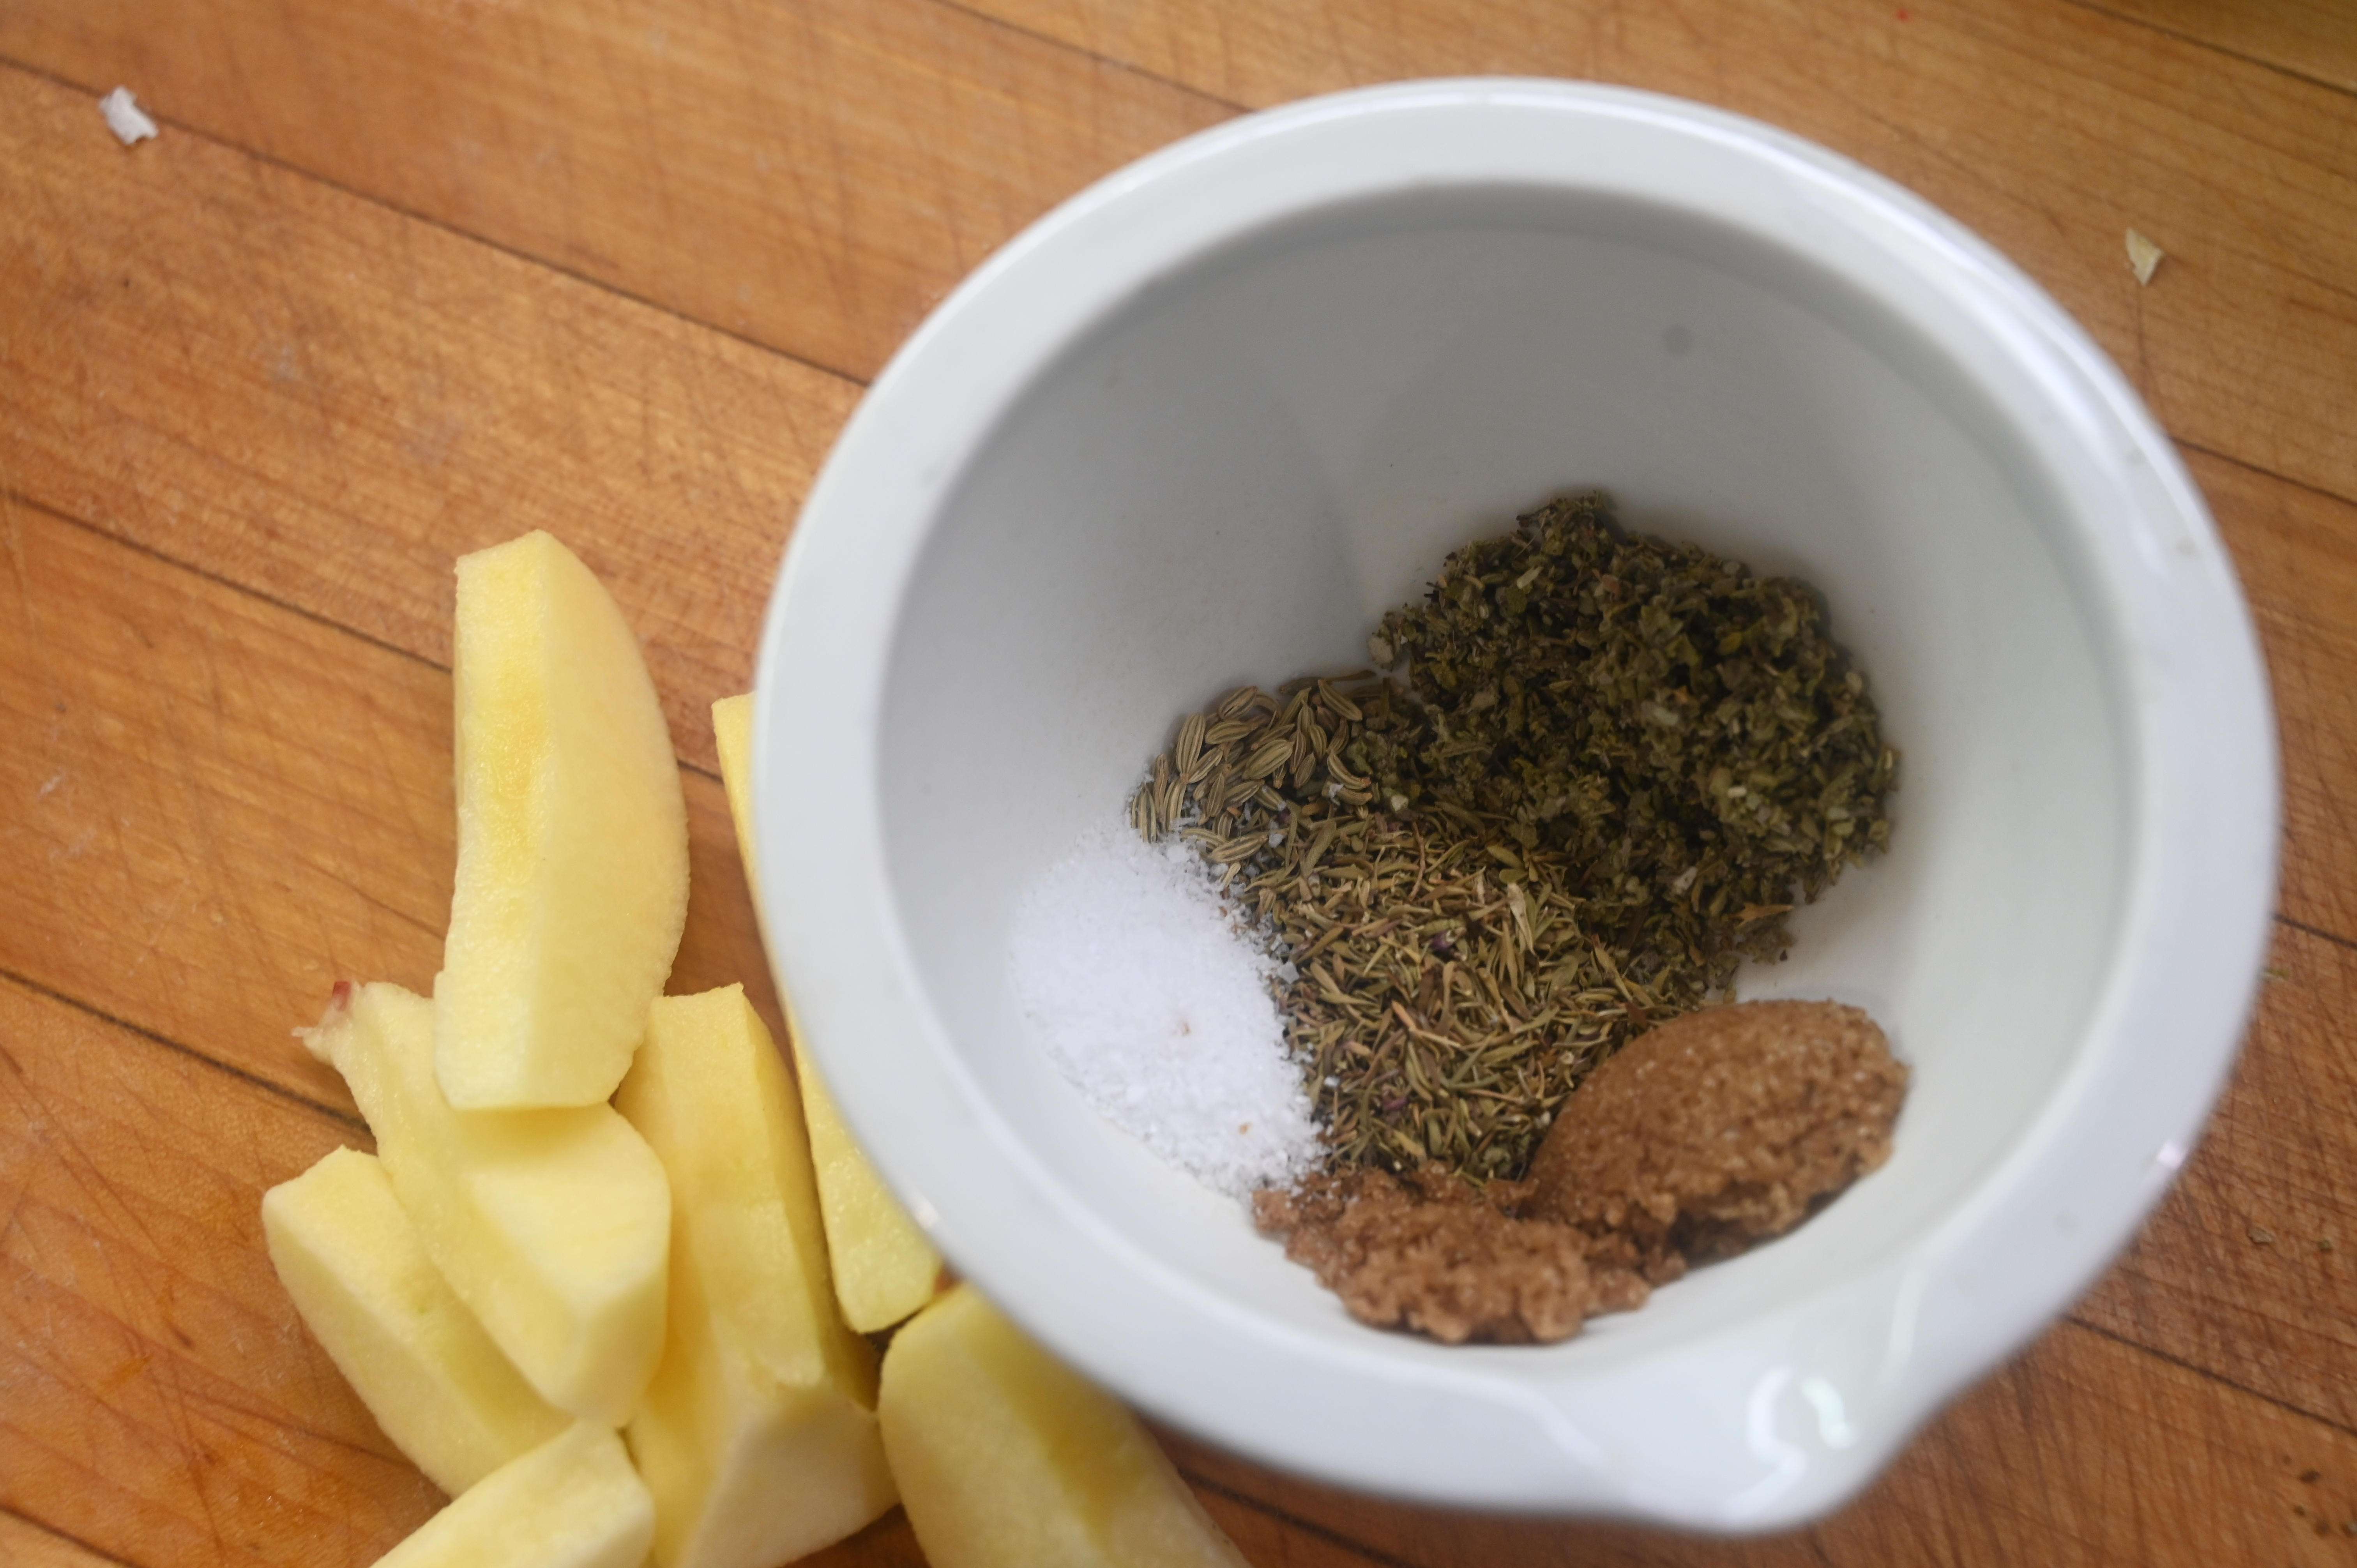
1 tart apple, peeled and cored
Mix the dry ingredients together in a mortar and crush them with the pestle, until the spice blend is uniform.
Using your hands and/or a wooden spoon mix the spices into the ground pork in a medium bowl.
Mince the apple pieces by hand or using a food processor and mix the apple into the pork mixture. You may not need all of it.
Use a ¼ cup measure to scoop out the amount of meat for each sausage.
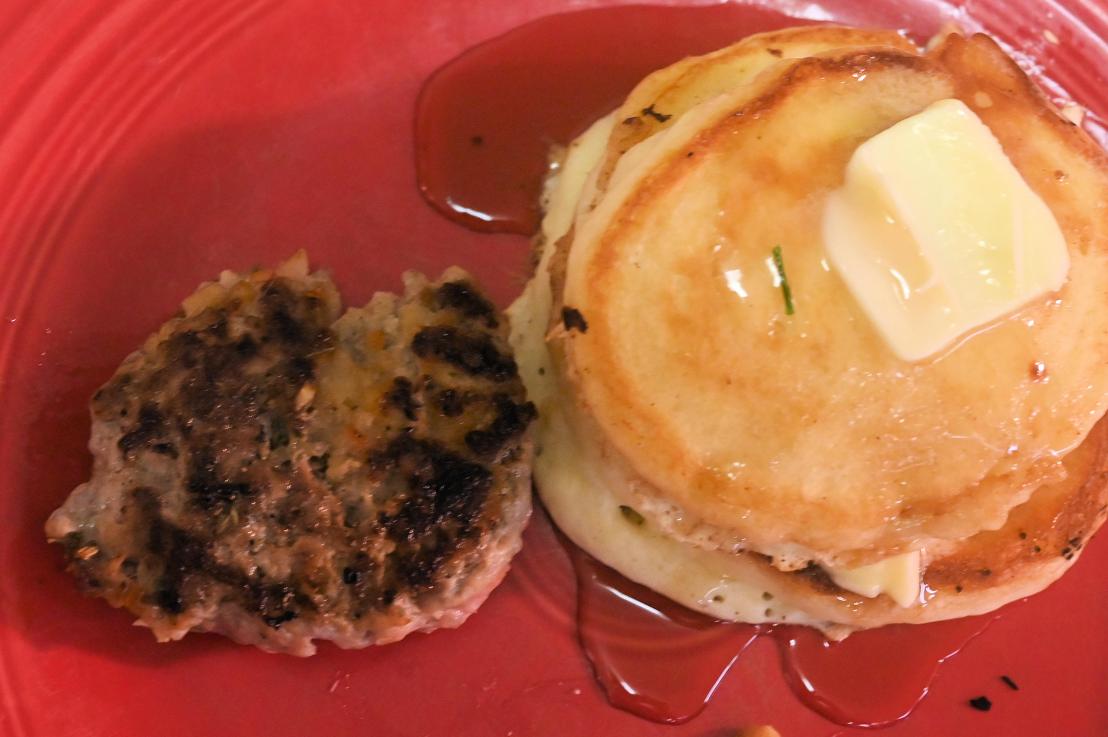
Cook the sausages on a 375˚ F griddle for 4 minutes per side. Press them down so they are flat. You might want to set a timer to keep from over cooking them and drying them out. The sausages are done when the internal temperature is around 145˚ F.
Keep the sausages warm while you prepare the pancakes or eggs to go with them.
This doesn’t take much longer than cooking frozen sausages, and the flavor is really terrific! Form all the remaining sausages into patties and freeze them in layers, separated by wax paper in a plastic freezer container. Makes about 1 dozen good-sized sausages.
Nerano is a charming Italian fishing village south of Naples on the tip of the Sorrento peninsula, just across from Capri. It is here the Spaghetti alla Nerano was invented in the 1950s. Stanley Tucci introduced flocks of American fans to this classic dish in the first episode of his “Searching for Italy” series, And recently the New Yorker published a definitive recipe for this fabulous dish. We tried it a couple of times and have some suggestions to make it work a little better.
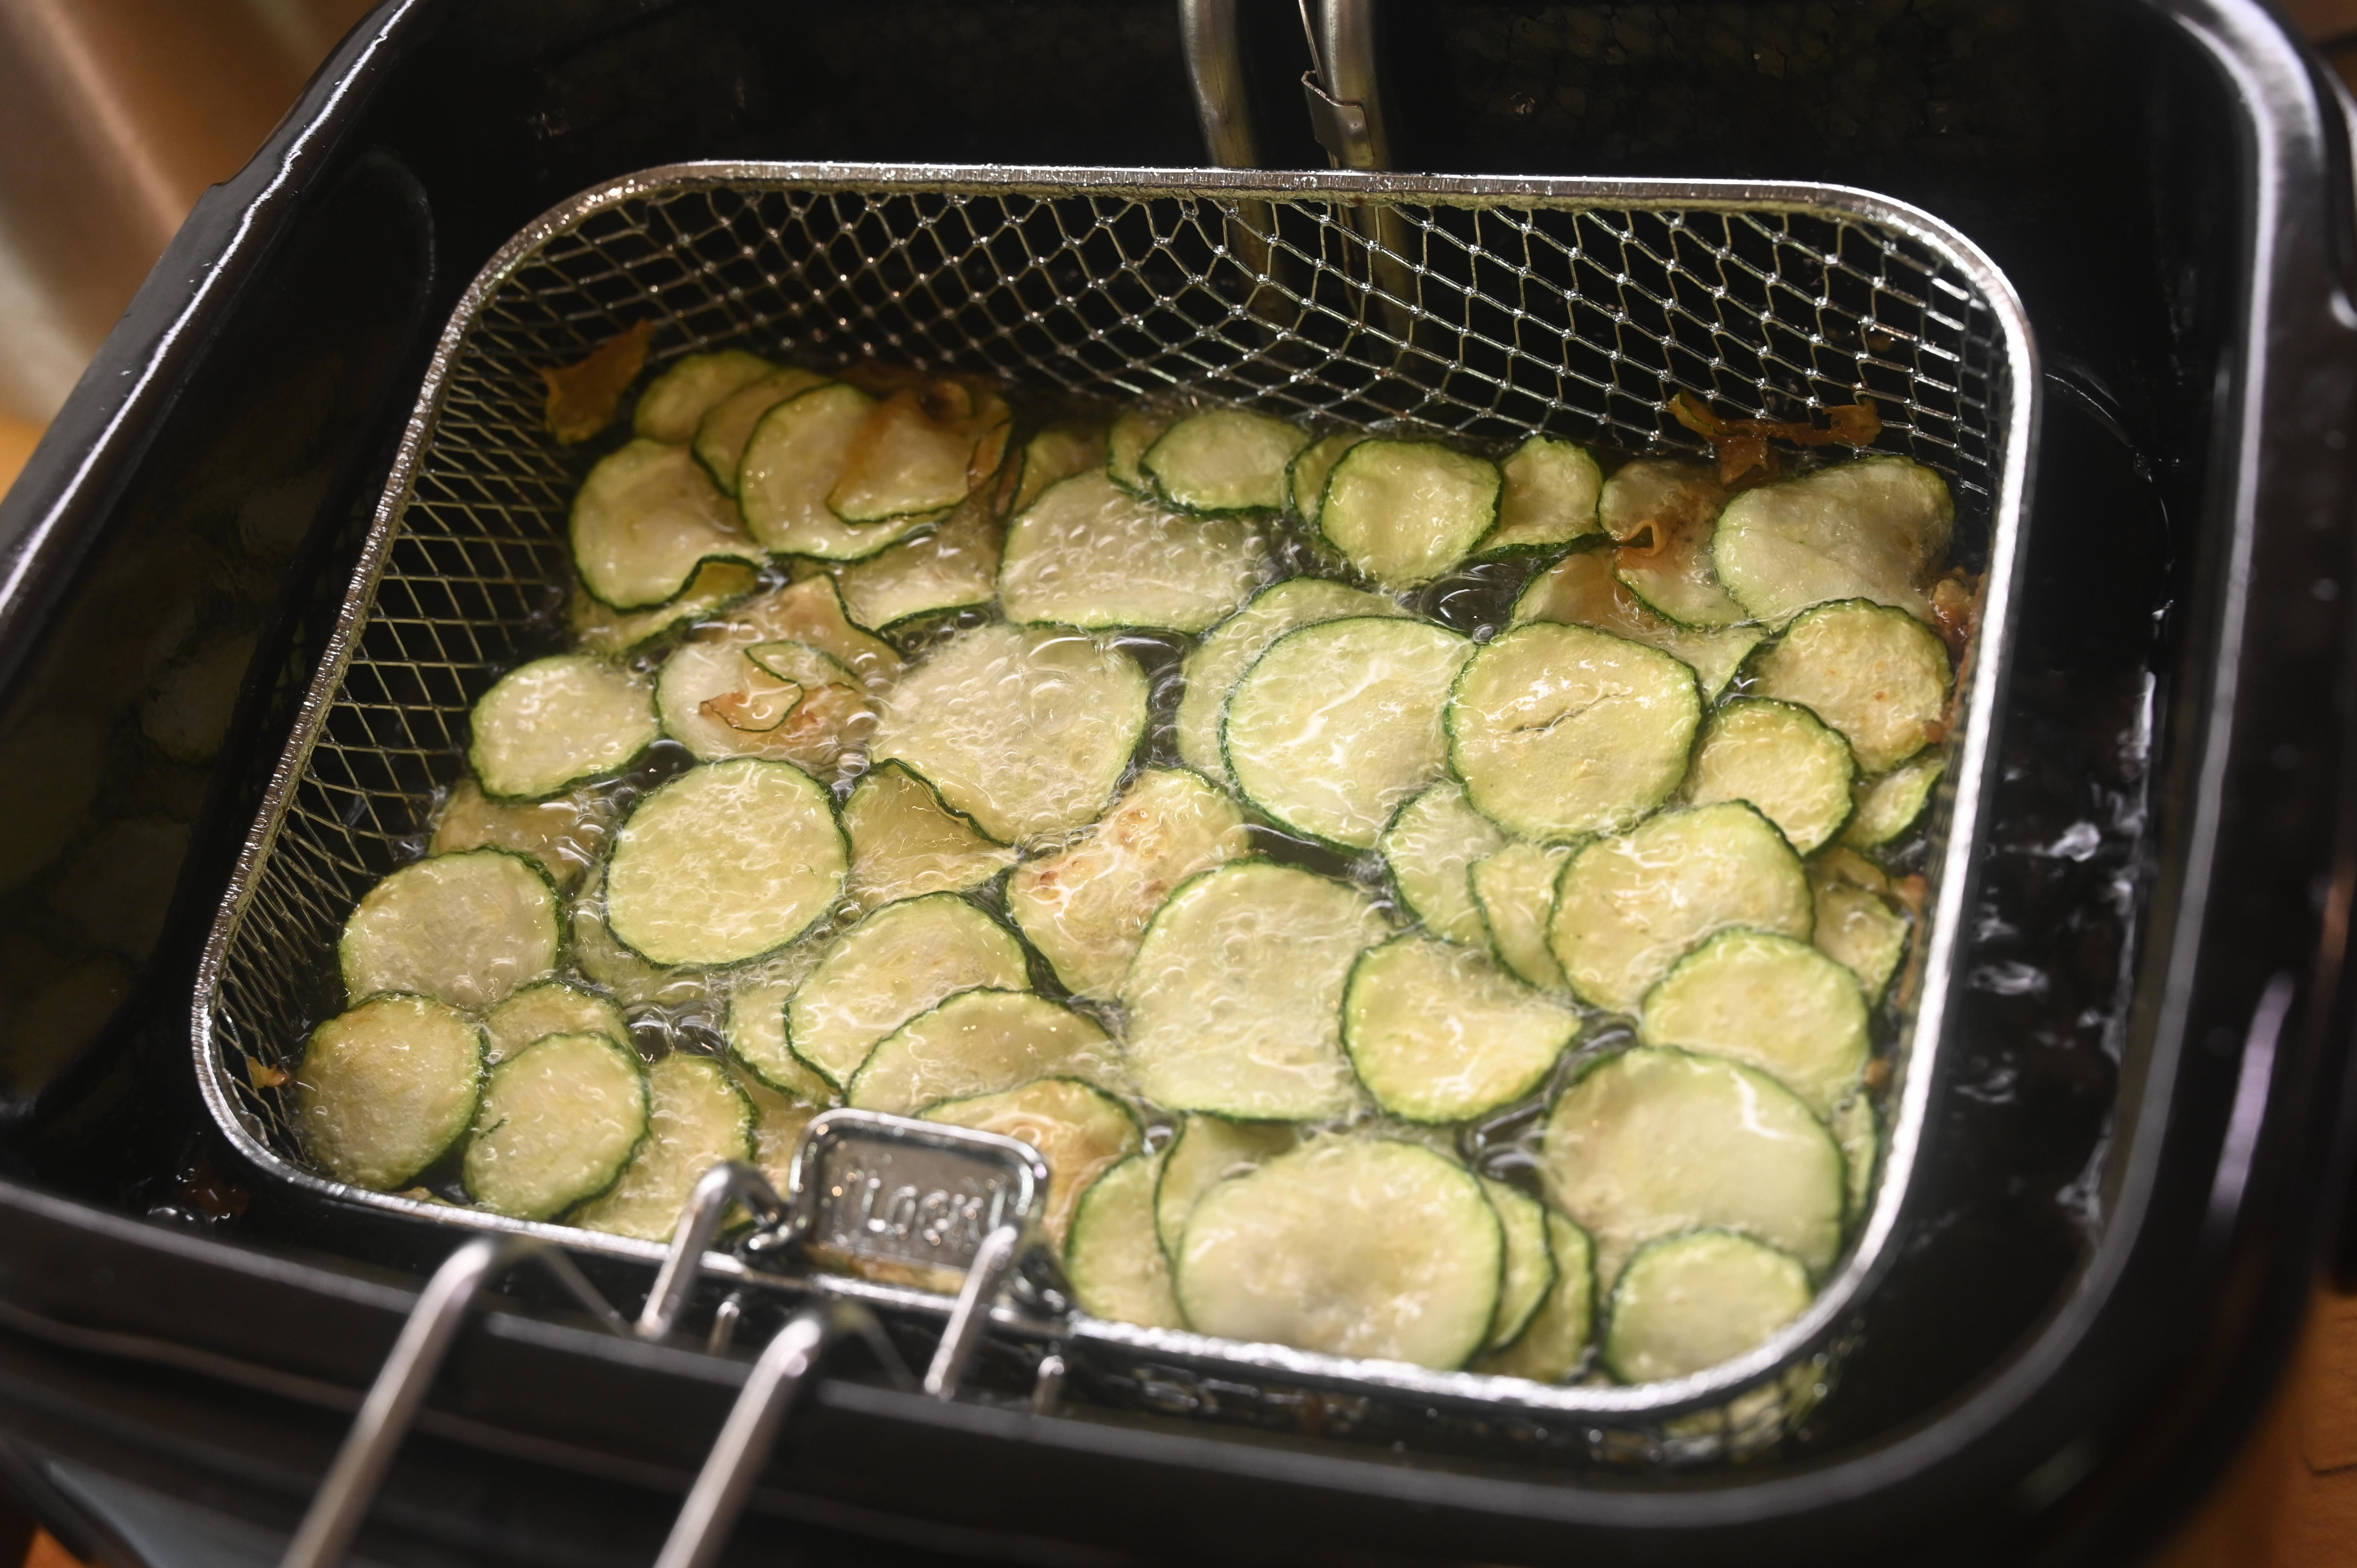
While the ingredients are just spaghetti, zucchini, cheese and maybe a pat of butter, there are some details in the recipe that make it work so well. First of all, the zucchini slices are deep fried, not pan fried, and you want them to get quite brown, nearly burnt to develop the flavor in an otherwise pretty tasteless vegetable.
Confronted with the need to thinly slice three or four zucchini, we resorted to our Cuisinart food processor, using the 2mm slicing disk.
Probably the most important thing about this dish is assembling while everything is still hot, so the cheese will melt. In professional kitchens. Two people assemble this dish. We’ll tell you how we did it with only two hands below.
The basic ingredients are:
3 medium zucchini
8 oz spaghetti
Deep frying oil: sunflower or canola
2-4 oz grated cheese (Parmegiano Reggiano or Provolone del Monaco or Caciovavallo)
1 clove garlic, minced
1 bunch basil leaves, cut up
Pat of butter
Grate the cheese in a food processor, and remove to a bowl
Slice the zucchini into thin, uniform slices. We used a 2mm slicing disk.
Deep fry the zucchini slices, until quite brown. For 3 zucchini, we divided them into 4 batches for frying.
Put the zucchini on paper towel on a plate to let them drain.
Bring a couple of quarts of salted water to a boil and add the spaghetti all at once, stirring with a pasta fork to make sure it submerges.
Heat the zucchini and garlic in a skillet.
If your spaghetti requires, say, 4 minutes to cook, scoop out a cup of pasta water around the 2 minute mark.
Put about 10% of the zucchini in the bottom of a medium bowl, stir in a handful cheese and add hot water to help melt the cheese into a creamy sauce.
As soon as spaghetti is about done, lift a little out of the boiling water and mix it into the bowl. Do not drain the spaghetti: it will cool too quickly, just lift it right out of the hot water.
Then in several layers, add zucchini, hot spaghetti and cheese and stir, adding more hot pasta water when you need it. The zucchini and cheese tend to clump together, so this layered mixing helps distribute it throughout the pasta. You may not need all the spaghetti. But when you have mixed all the zucchini and cheese with some of the spaghetti, stop and arrange the mixture on a serving plate.
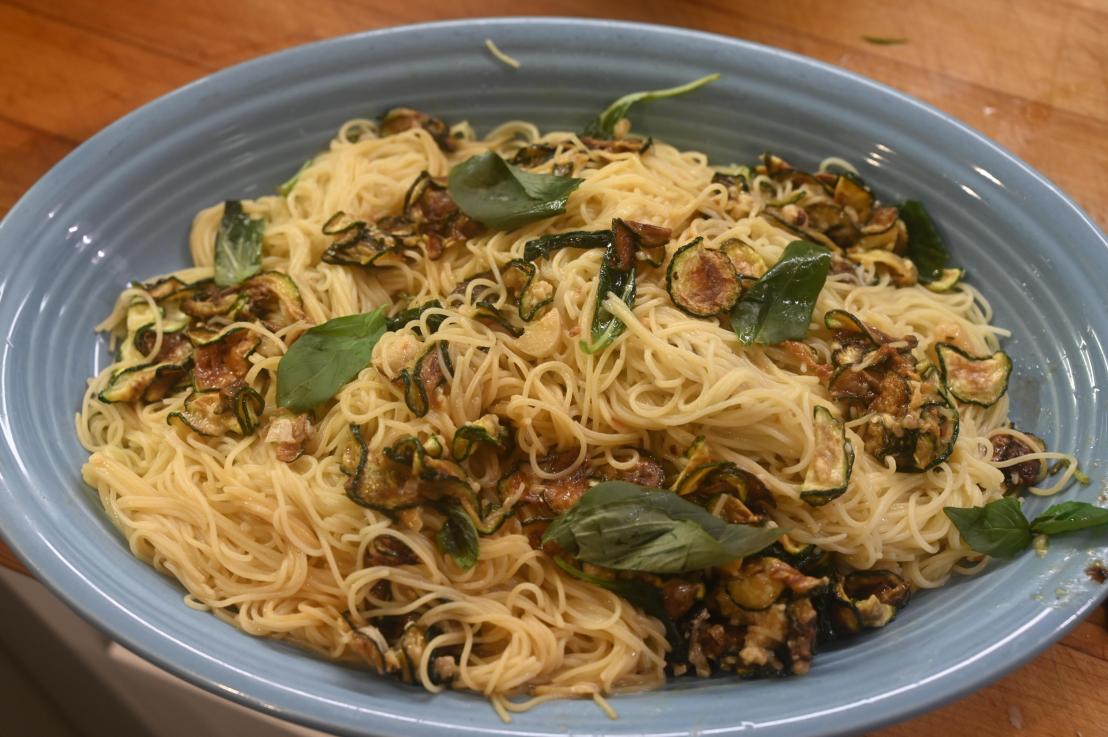
Top with a pat of butter and the basil leaves and serve right away.
You can serve this as a main dish or as a side dish. Here we illustrate a side dish serving with a few meatballs to make the meal. You will be amazed at how good this simple meal can be!
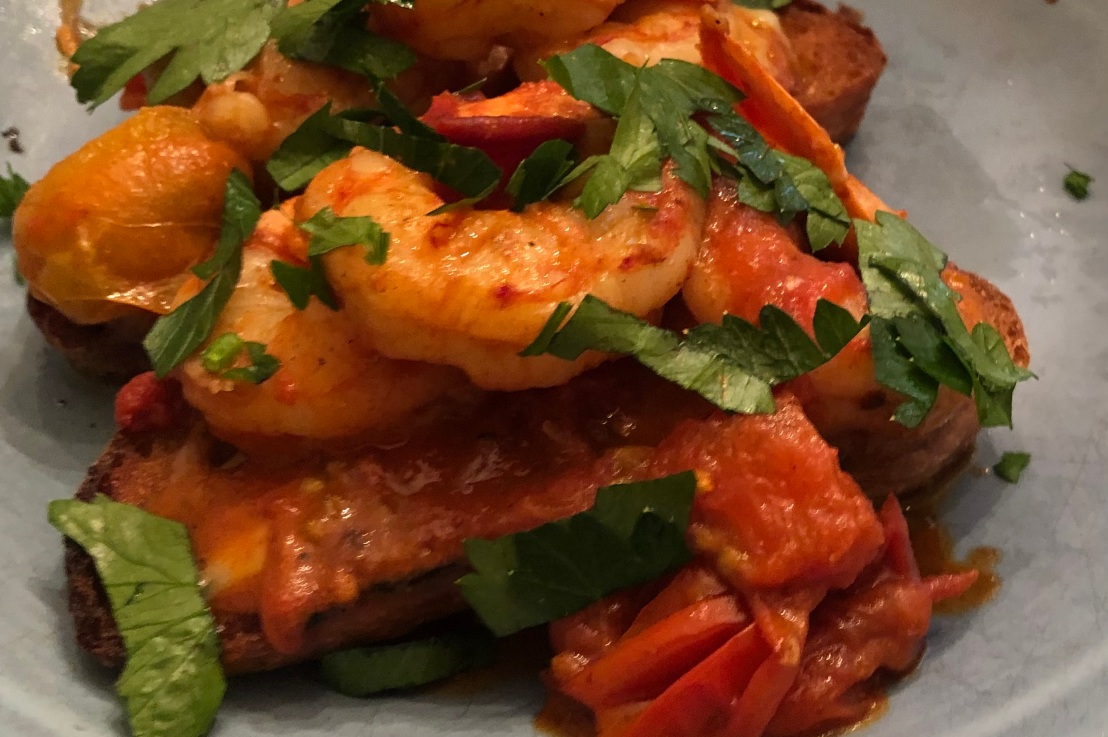
It doesn’t take long to put together this shrimp aioli dinner. All you need is shrimp, crusty bread, some garlic mayonnaise (aioli) and a few common spices. We made ours using red Indonesian shrimp because they looked the best that day, but any fresh shrimp will do.
1 lb fresh shrimp
2 cups cherry tomatoes, stems removed
3-4 slices crusty bread
Olive oil as needed, probably 4-5 Tb.
3 garlic gloves, thinly sliced.
1 Tb wine vinegar
1 ½ tsp smoked paprika
1 tsp ground cumin
½ tsp red pepper flakes
Chopped parsley
The Aioli
2 egg yolks
1 Tb fresh lemon juice
1 tsp Diamond Crystal kosher salt
1 large clove of garlic, mashed and minced (or use a garlic press)
½ cup extra virgin olive oil
You can make this in a bowl with a whisk or use a blender. The blender is faster.
Put the egg yolks lemon juice, salt and garlic in the blender, and with the blender running, slowing pour in the olive oil. Let it run another 10-15 seconds and top. You should have a nice mayonnaise. Put it in bowl in the refrigerator while you prepare the shrimp.
The Shrimp
Place the shrimp on a plate and dry them off. Sprinkle with kosher salt and let rest while you make the toasts.
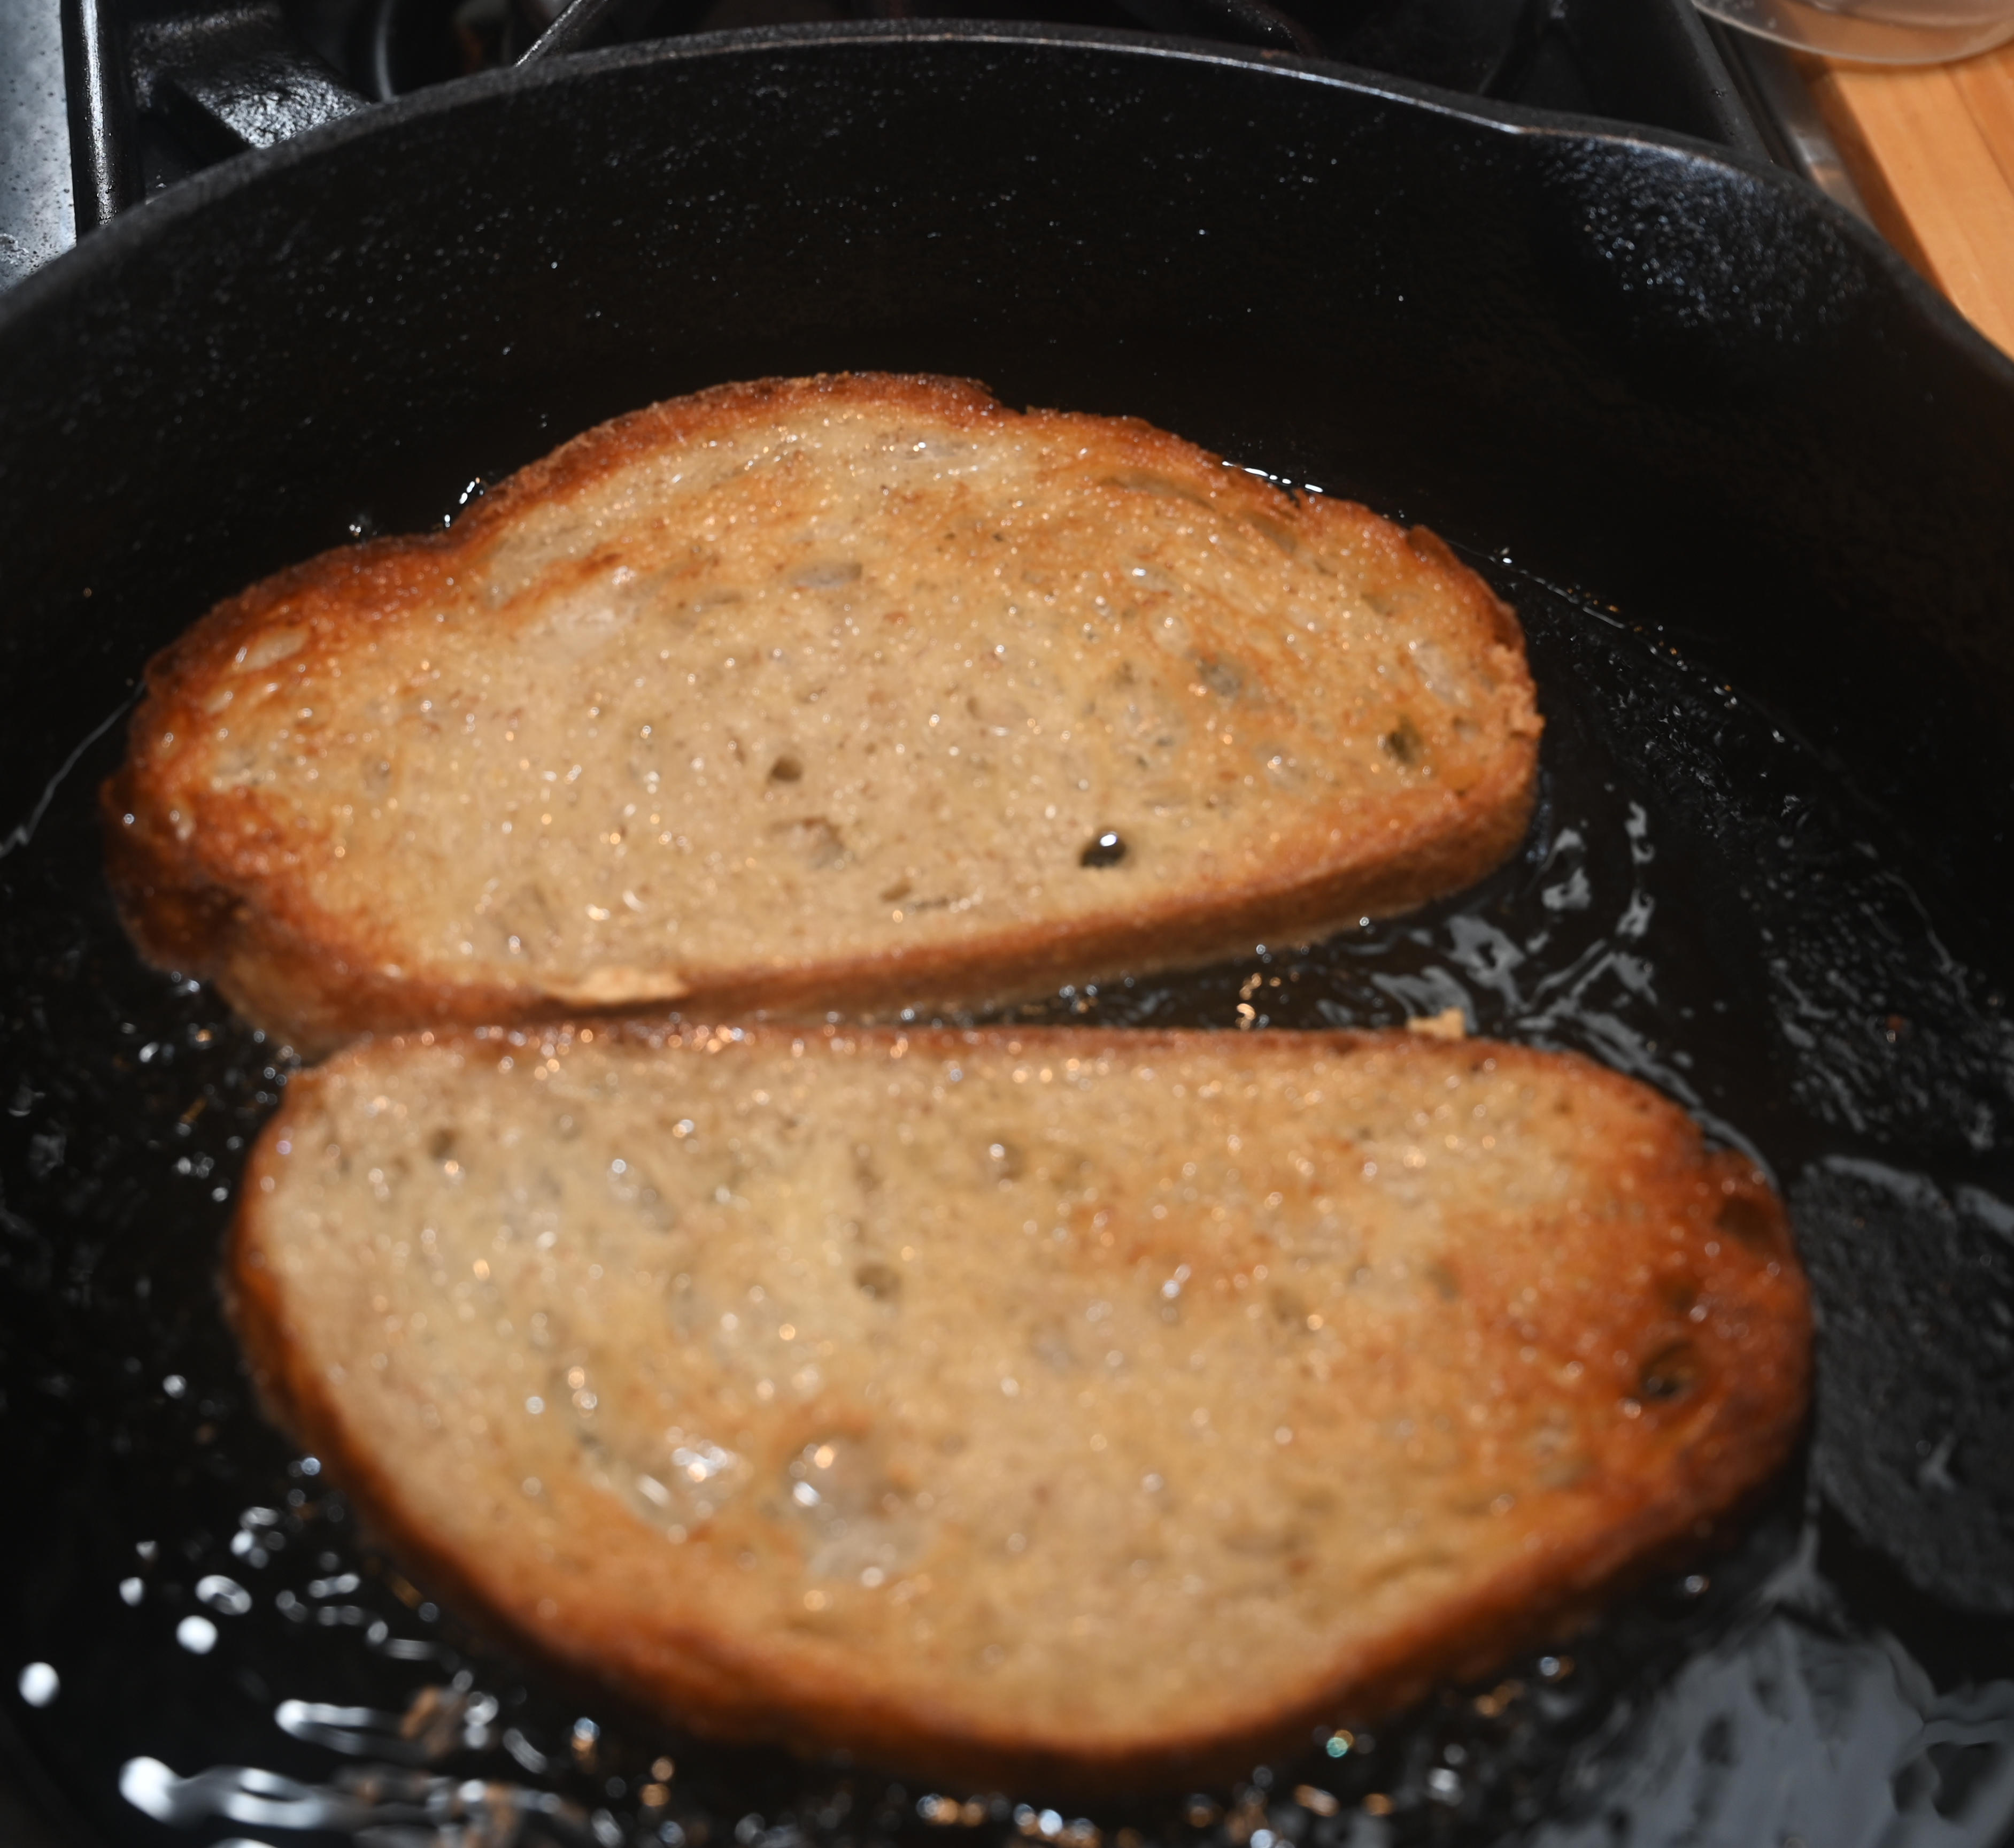
Put 2 Tb olive oil in a cast iron frying pan, and heat to medium high. Put in 2 slices of toast and brown. Turn the toasts and brown the other side. Drain on a paper towel and repeat with the other slices, and drain.
Add more olive oil and cook the shrimp for 2 minutes on one side, and turn and cooka bout 2 minutes more. Remove the shrimp to a bowl.
Add more olive oil and all of the cherry tomatoes. Cook at medium high until they brown on the bottom, about 4 minutes. Turn them all over and cook another minute or two.
Add the vinegar, sliced garlic, paprika, cumin and ½ tsp red pepper flakes and 2 tsp Diamond Crystal salt. Cook, stirring until some of the tomatoes begin to burst. Add the shrimp and stir until heated through.
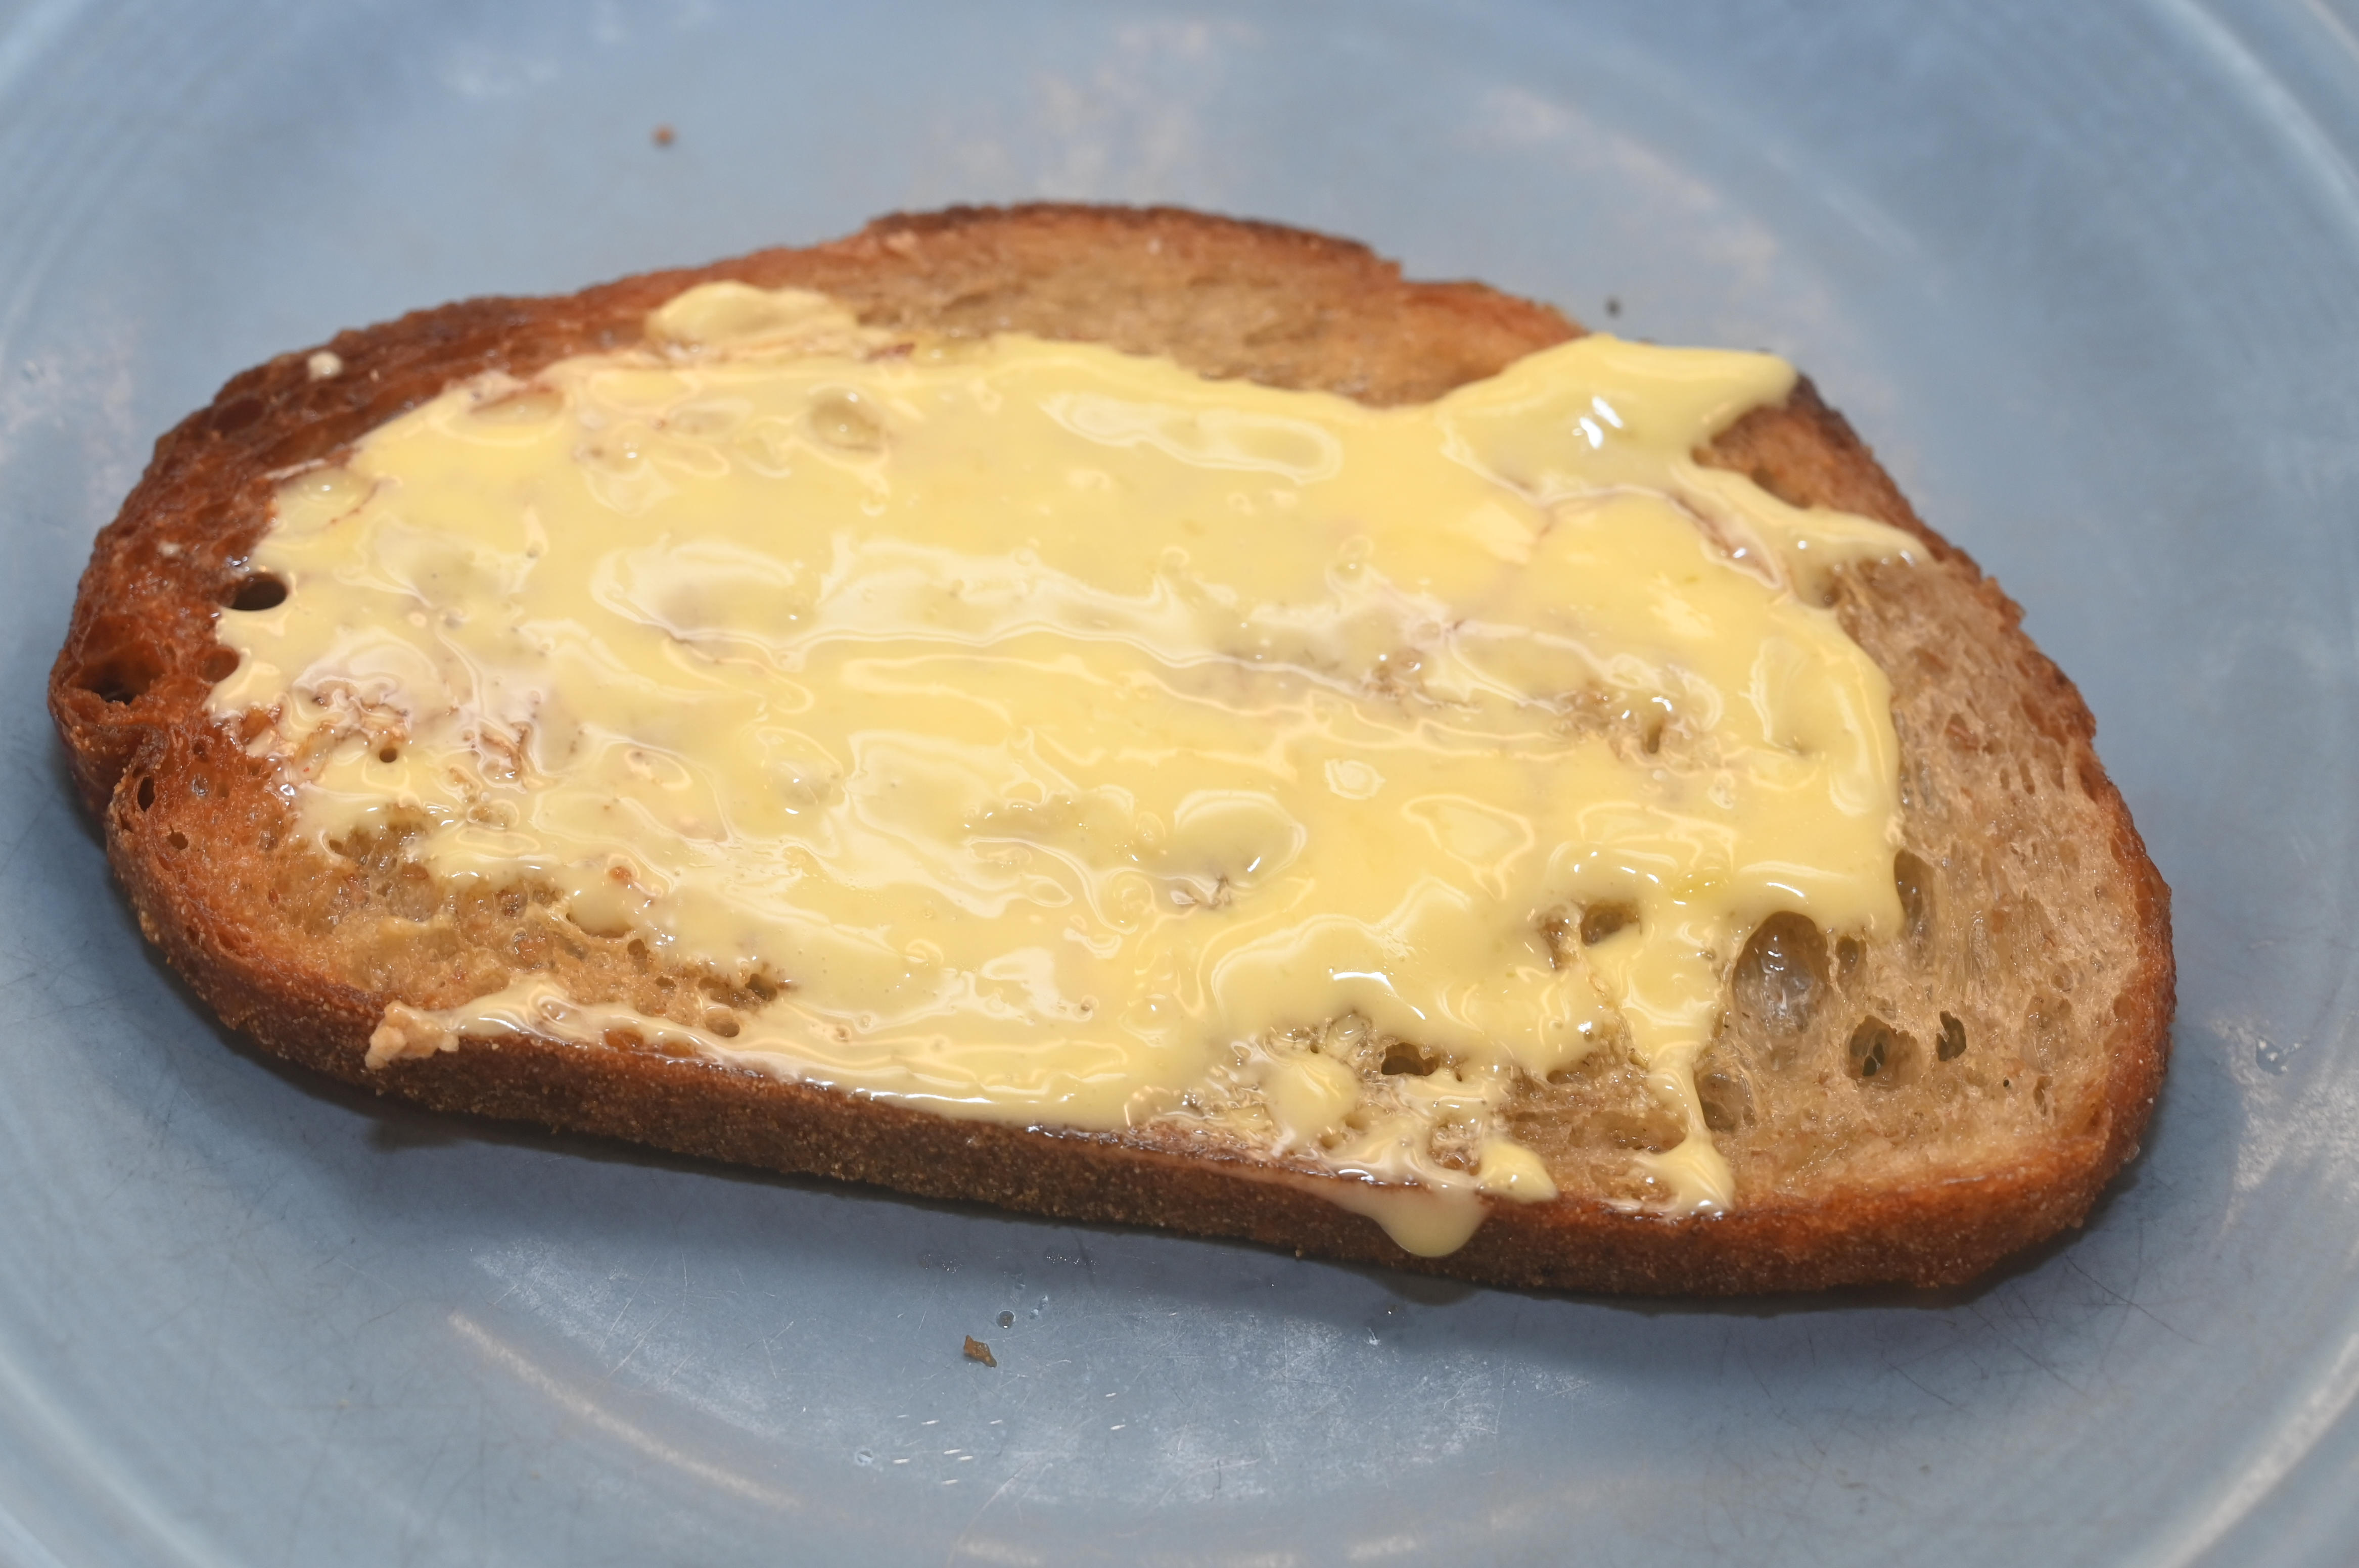
Spread the aioli thickly on the toasts and spread the shrimp and tomatoes on top of the aioli.
Decorate with parsley and more pepper flakes and serve at once.